
I’m notorious for writing long posts. A rebuild of the FatBoy is going to be one of those posts.
To save you reading all my rambling words of ‘detail’, i’ve first added a quick captioned photo timeline of the build from start to finish as a visual tour (Part 1), then followed by all the “rambling” as a detailed breakdown (Part 2).
Part 1: FatBoy Visual Rebuild Tour
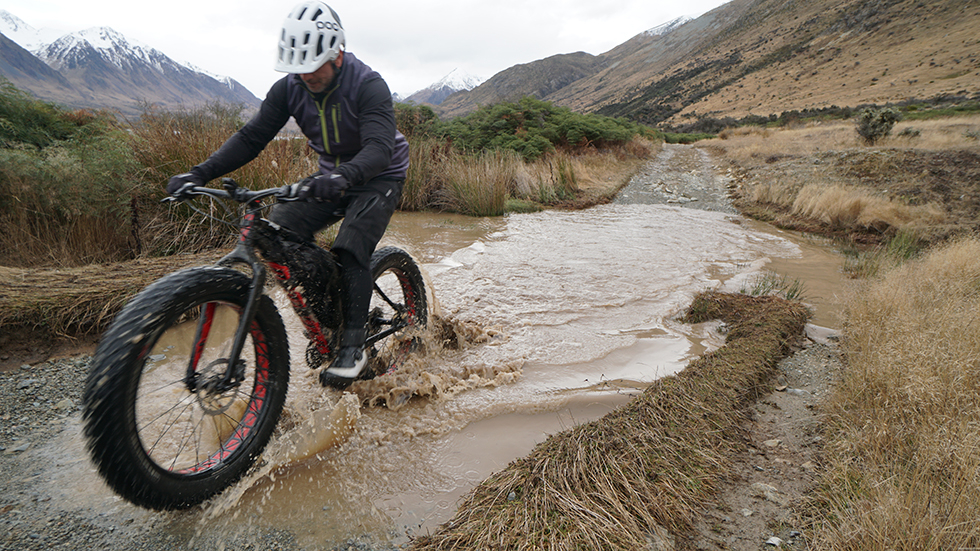
Well used and abused FatBoy
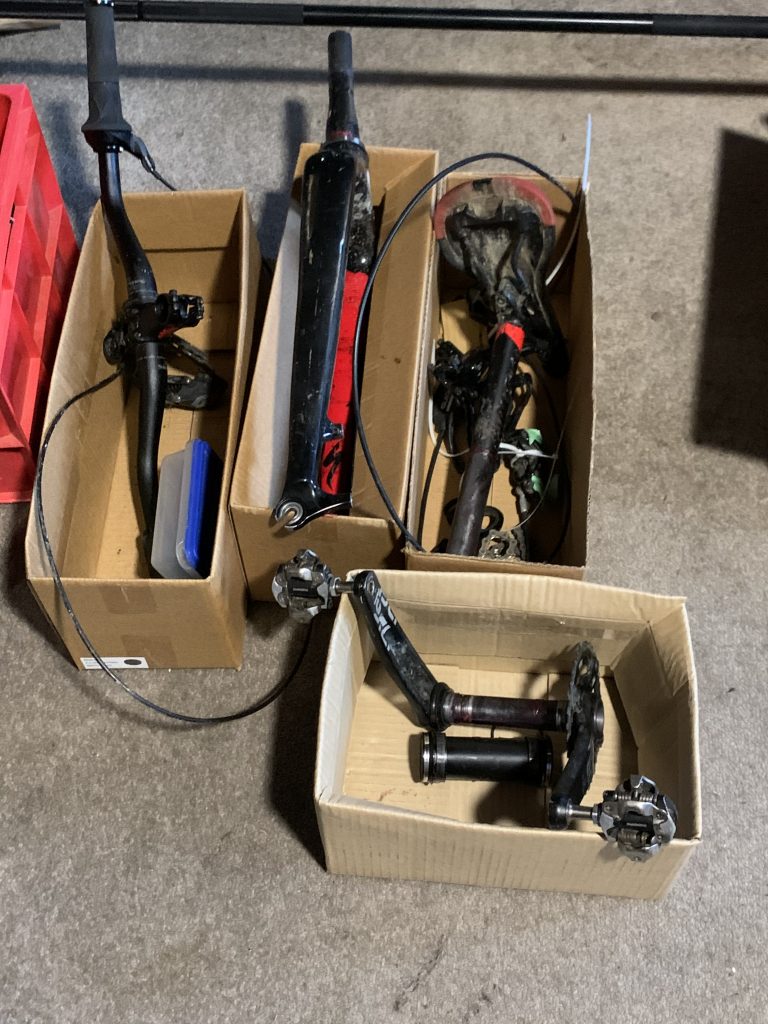
First Step – Remove the Wheels. Easy
Off to the Bike shop for the crank and bottom bracket to be removed
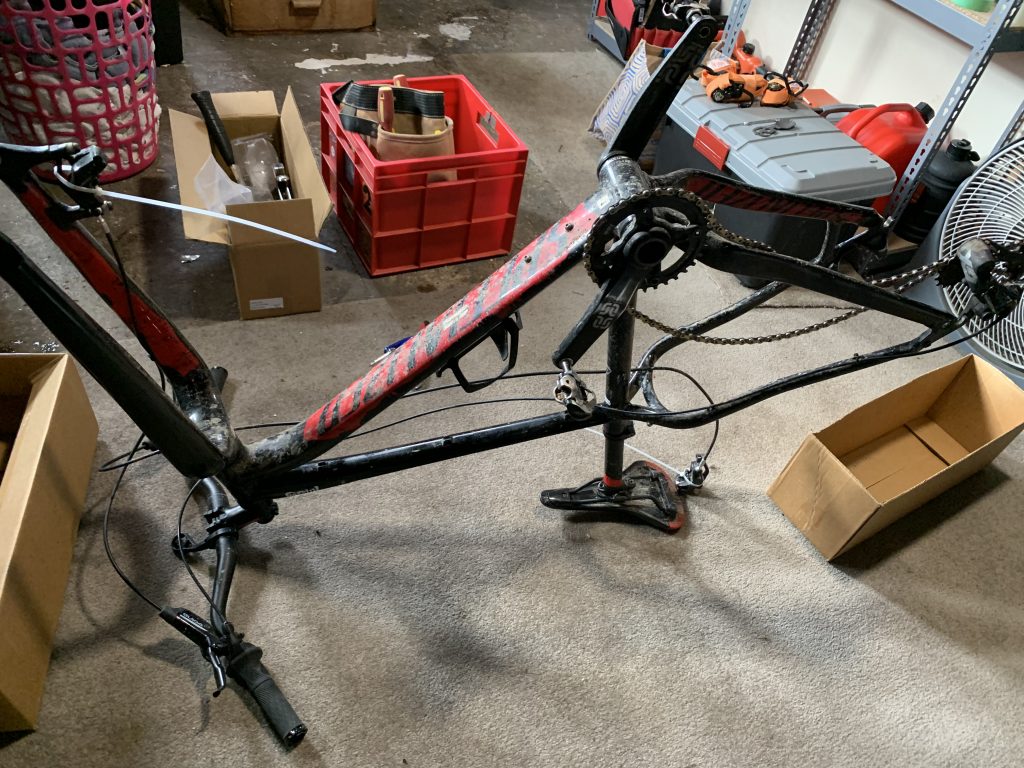
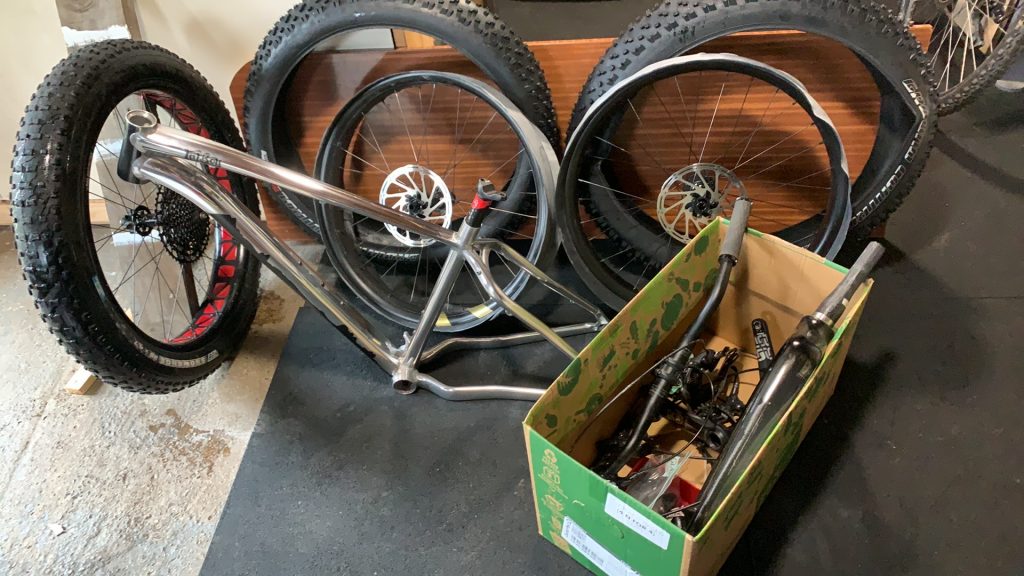
Box of bits coming together
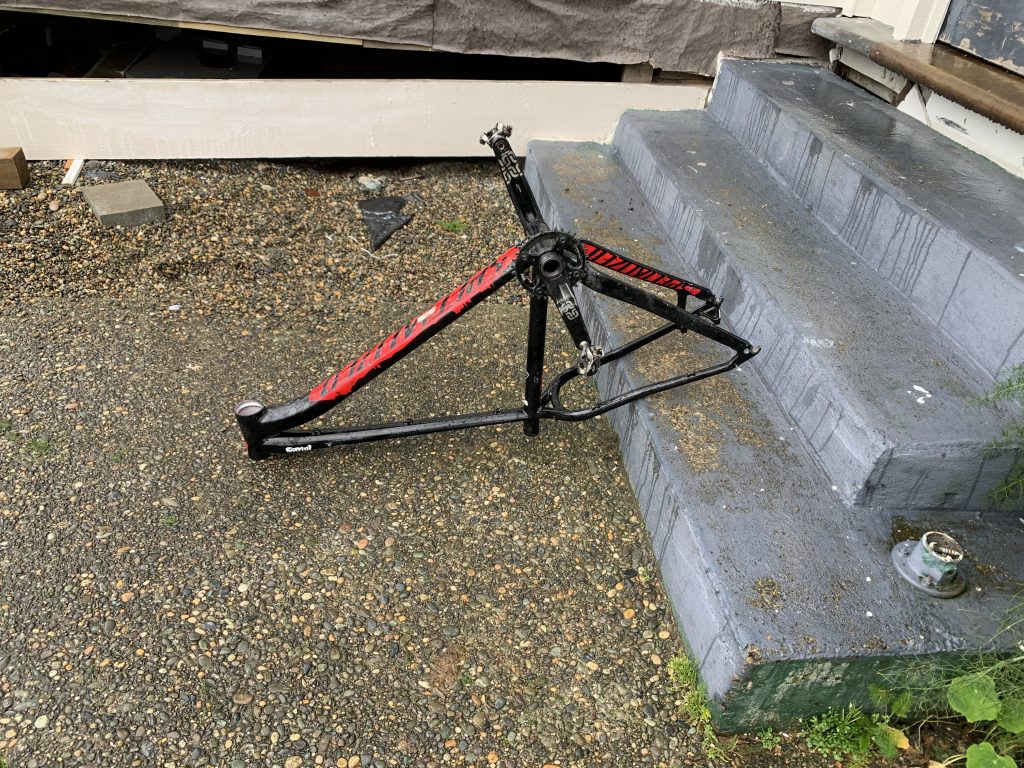
Scored a bike box
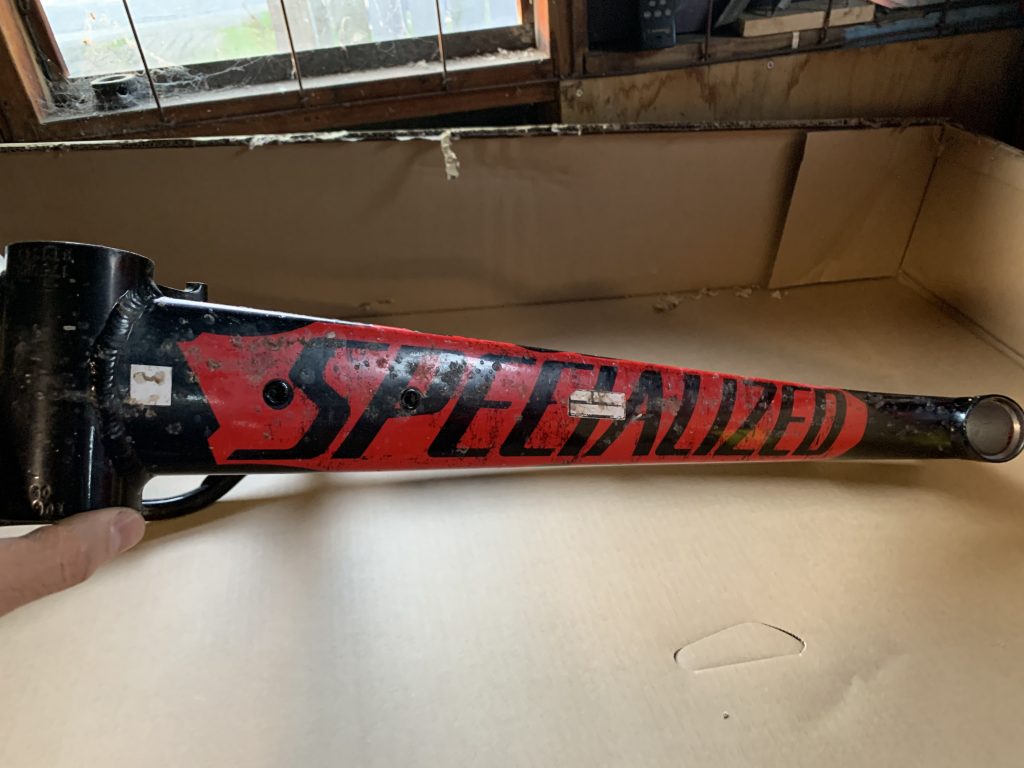
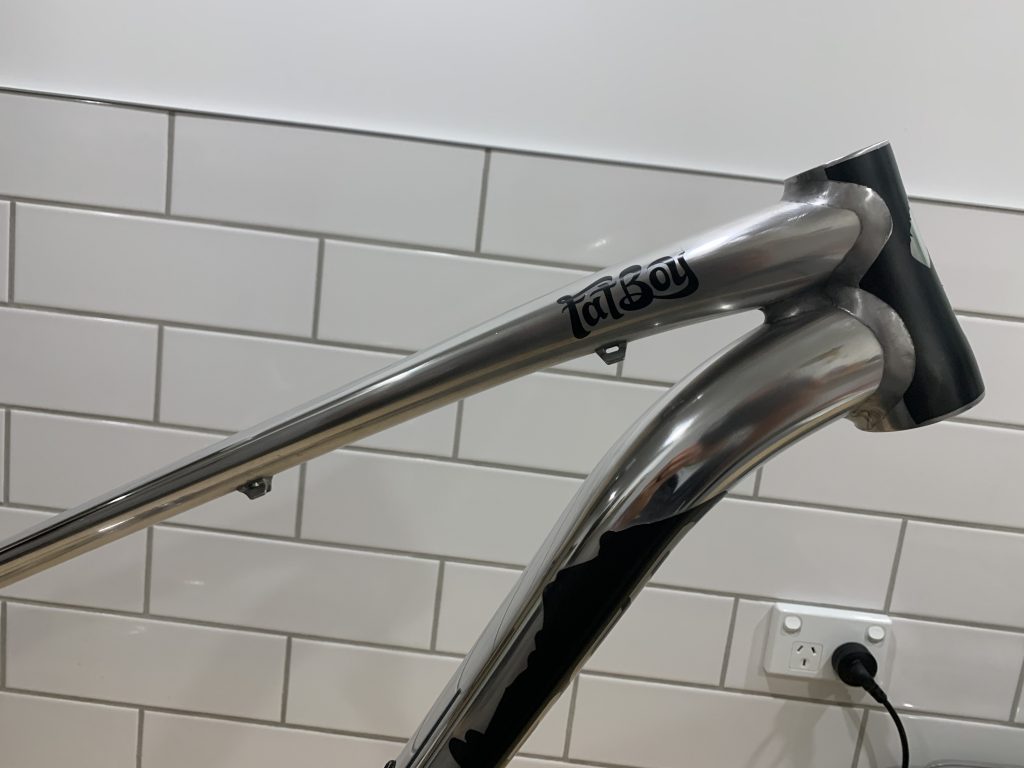
Taking photo evidence to know where the fatboy logo sits

Wondering where I can find the fatboy logo
Paint stripper applied. Burn baby burn

Paint is scraping off well.
Liking the look of the dull alloy
Looks better than being black
400 – 800 Grit sandpaper
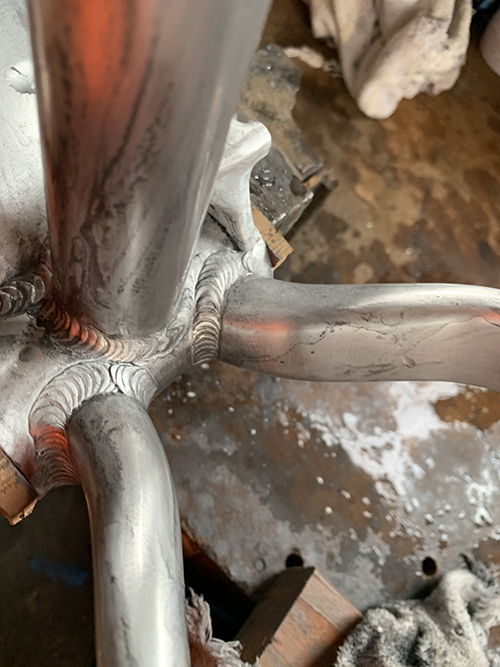
Sanding the welds is a mission (decided not to go to town on the bottom welds)
Sanding crossways on the frame. Still heaps of scratches
Top Welds smoothing out well.

Wet and Dry sanding makes a difference
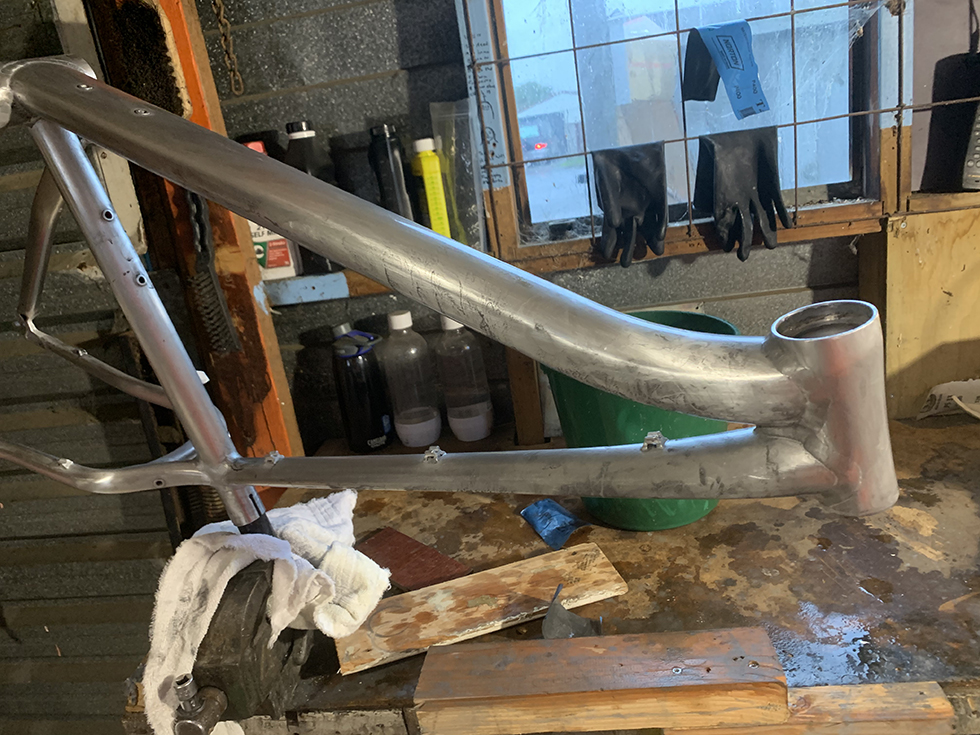
Bottom Welds are hard to sand.
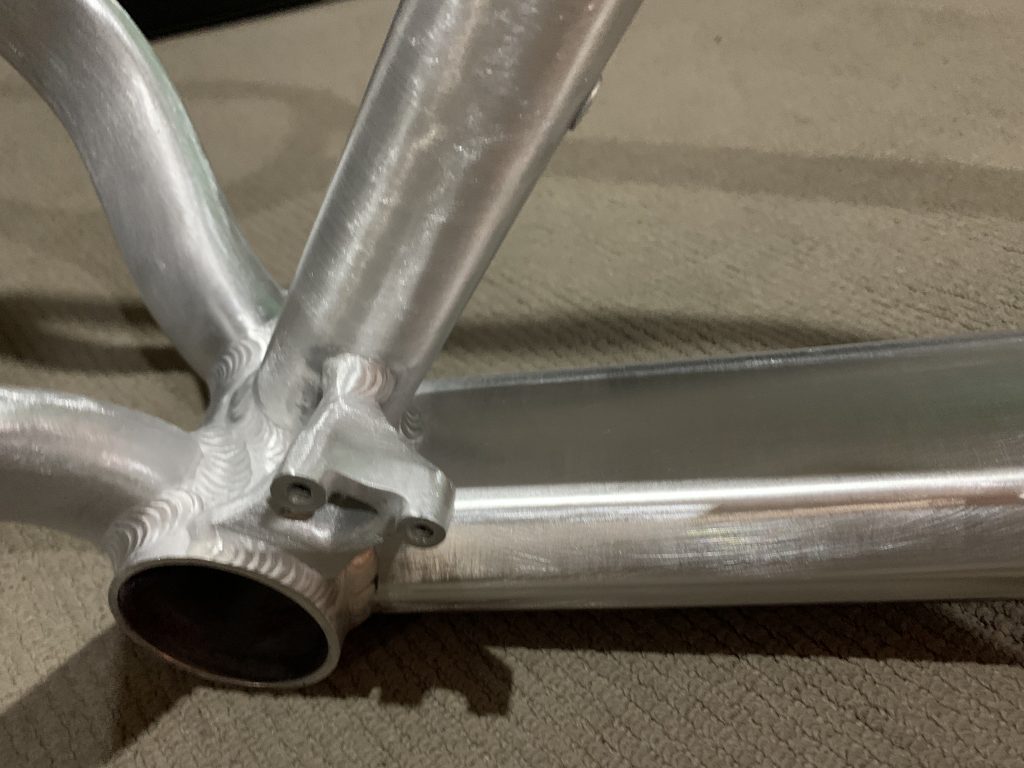
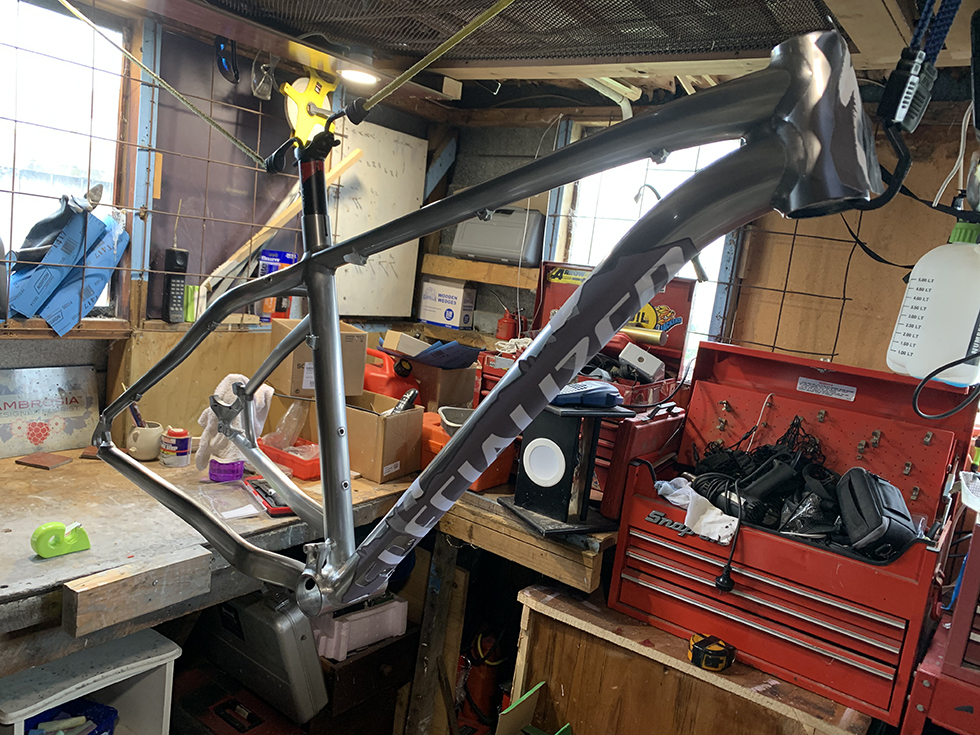
Bike was converted from the original 2x system to a 1x system. No need for front derailleur. Decided to keep the mountings in place.
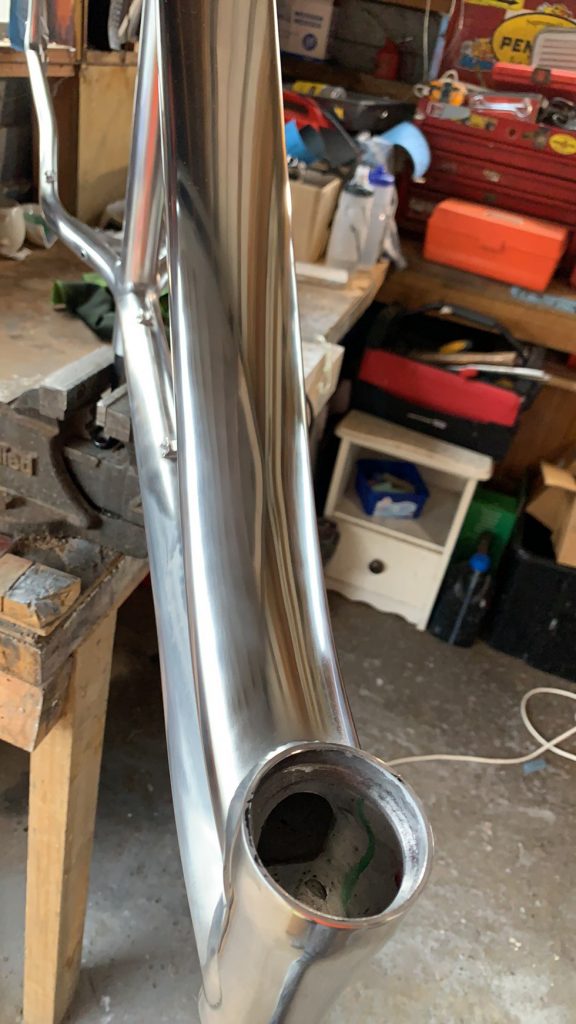
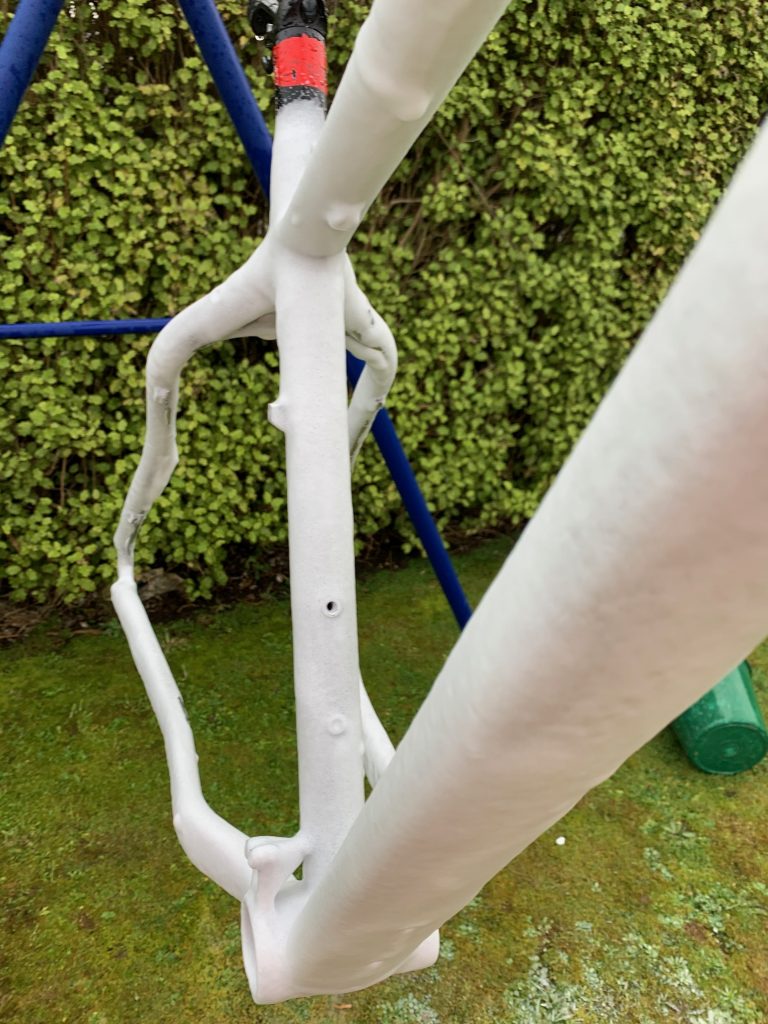
Wet & Dry 1000 Grit + Polishing with Autosol, takes the frame to shinny land.
Carbon Fork was more time consuming to sand down. (talking days here)
Almost regret sanding the black paint away. Carbon ‘dull’ looks ok
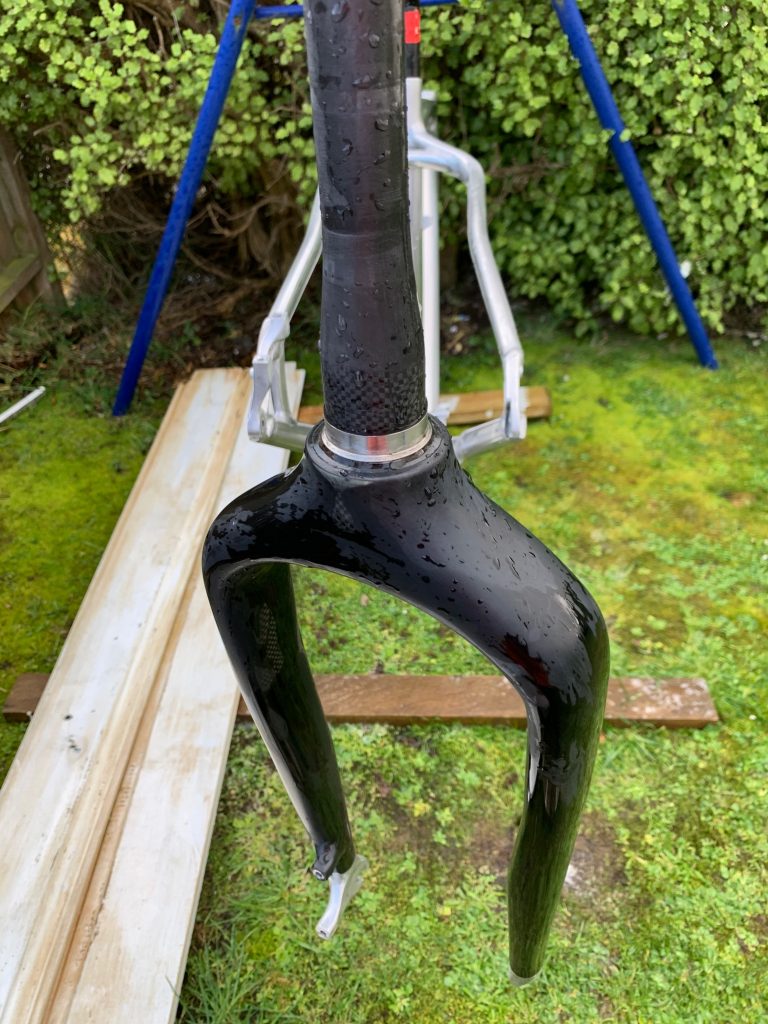
Even though it looks shinny, on closer inspection there are fine scratches. Went from 1000 – 1500 to 2000 Grit
Clear coat applied and drying. The coating took the shinny away.
There were two attempts at clear coating before I went a different path. (It then peeled off a couple of weeks later)
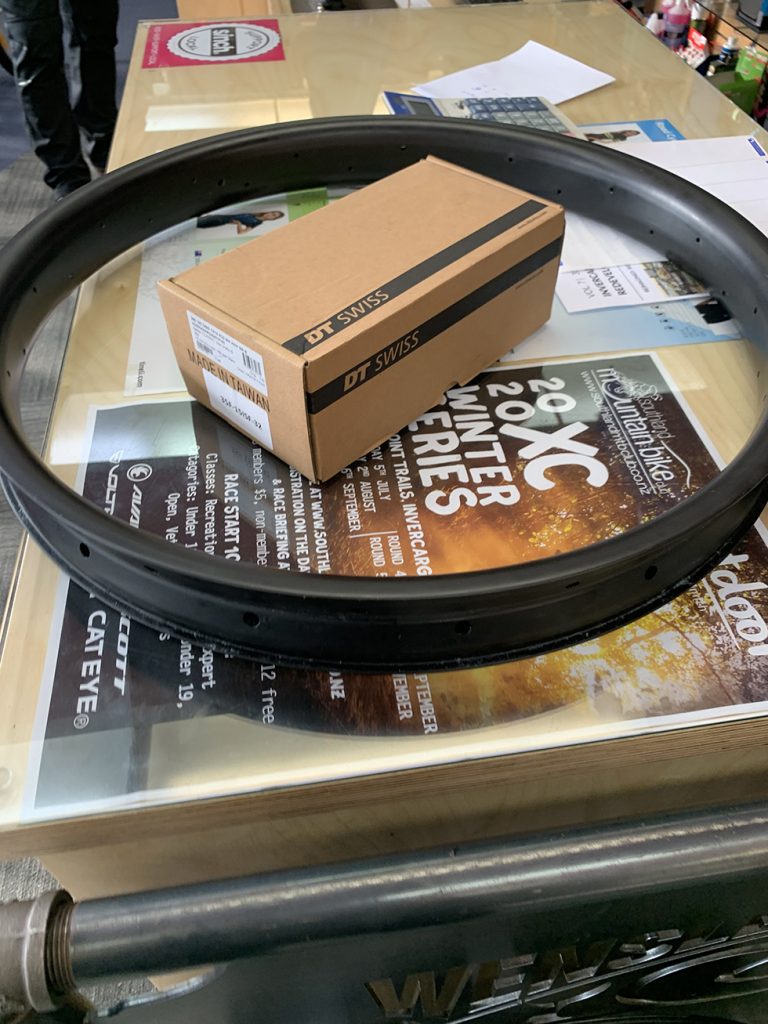
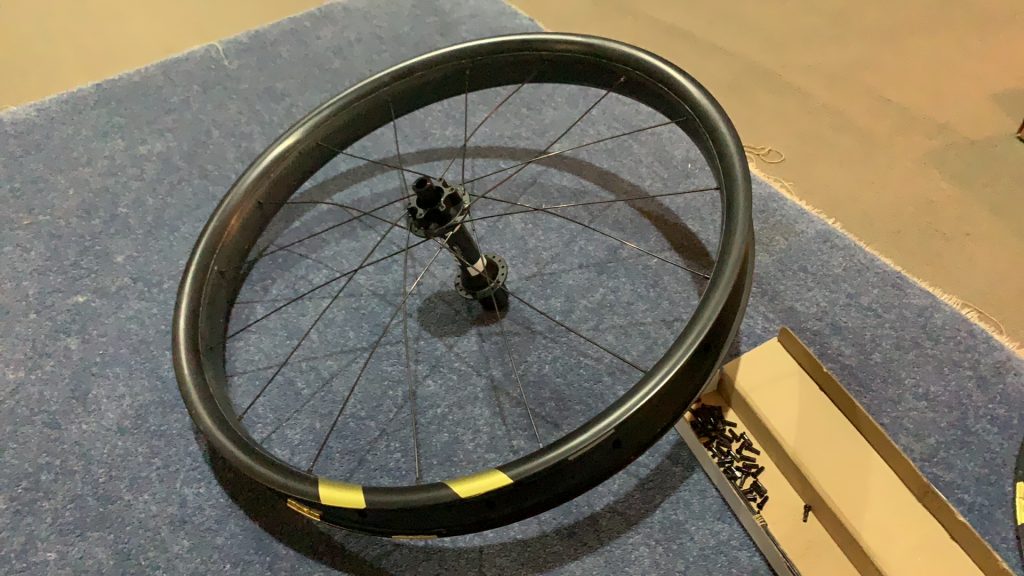
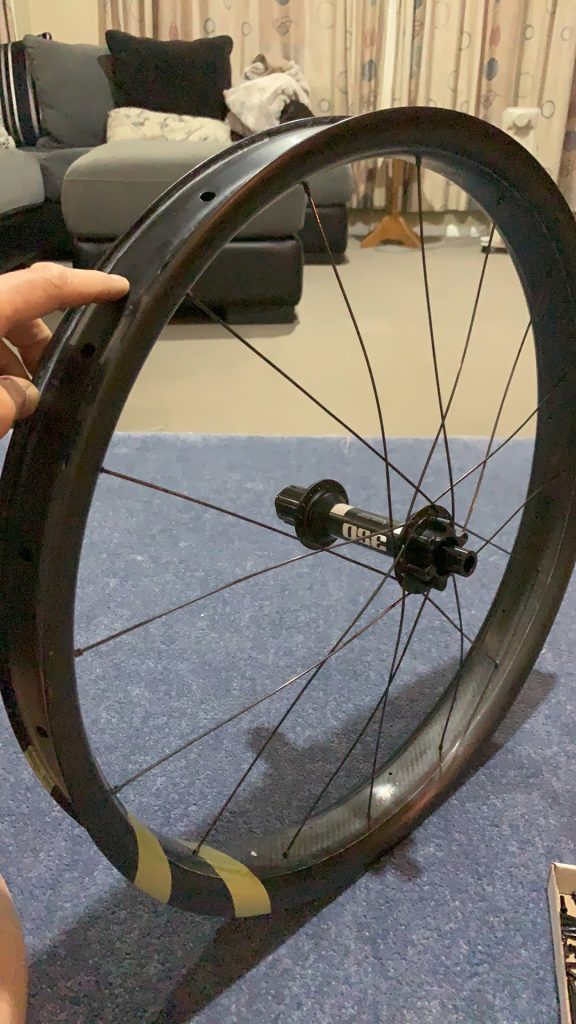
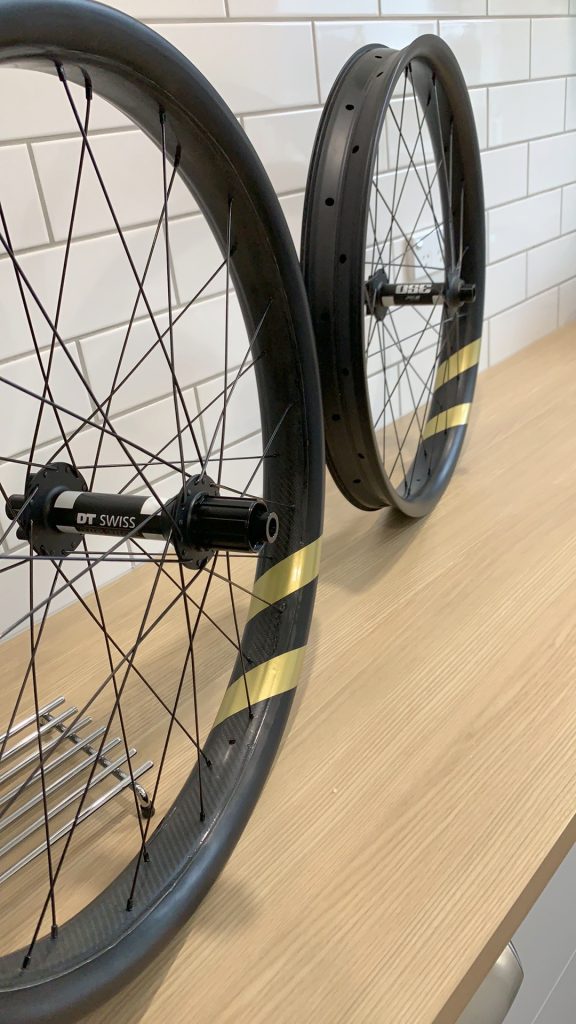
Carbon Rims and new Hubs!
Working the Gold in
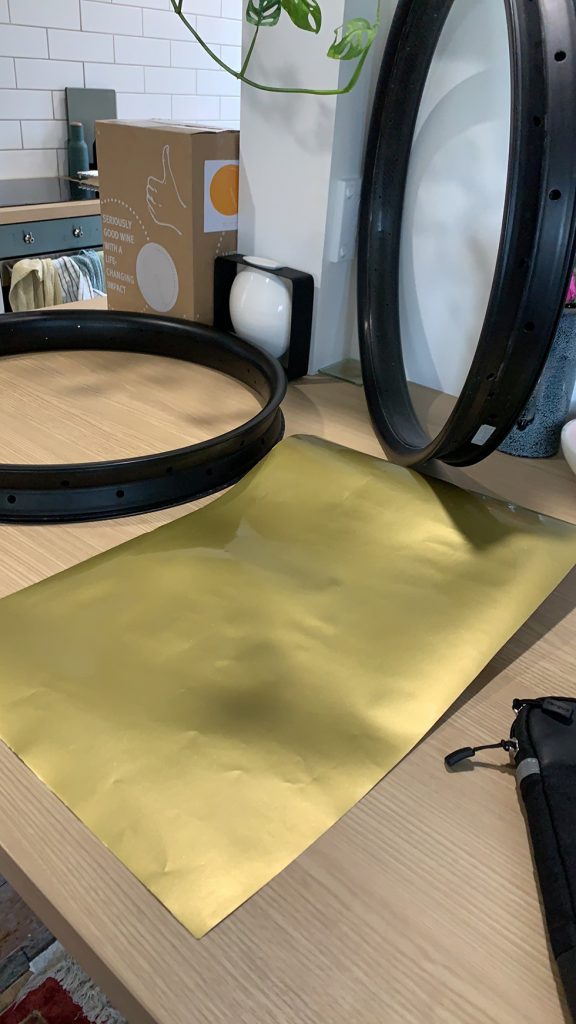
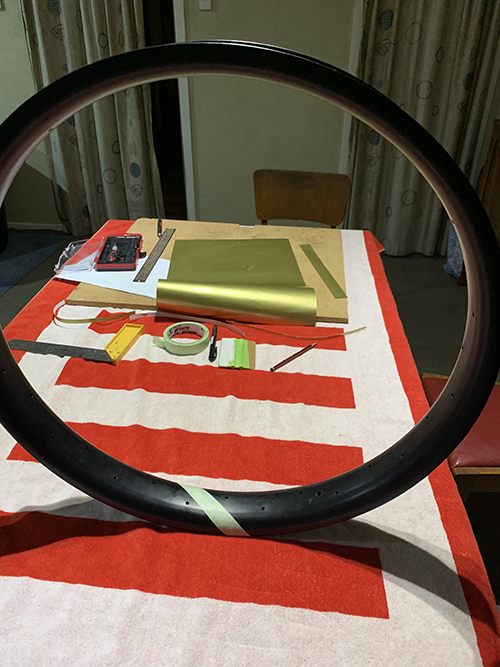
I could have stripped it up in thirds around the wheel. But sometimes just a hint of colour is enough.
Positioned between the Spoke holes. Both Rims have the same angle applied for the graphic. Easy to put on.
If you ever get to Spoke up your wheels. Don’t follow a You Tube Video. Use an existing wheel and go spoke for spoke.
This is a 3 cross pattern.
It’s handy to have a Spoke tool. I dropped the nipples into the wheel so many times.
Bending Spokes to get them to fit. Easy to scratch your rim when bending spokes.
Two wheels done. Off to bike shop to get trued up
Even though these rims are tubless ready. Using a 24″ fatbike (kids) tube as the inner seal against the rim works really well for the peace of mind – when riding in the middle of nowhere. (No fatty stripper used here!)

Photoshopping up the DownTube Graphics that I couldnt get anywhere. So made my own.
Graphic before it was modified to work around the Divet holes.
Mock graphic being applied to check alingment. I ended up making it wider on the sides so it wrapped around evenly.
And I moved the letters downwards towards the bottom bracket.
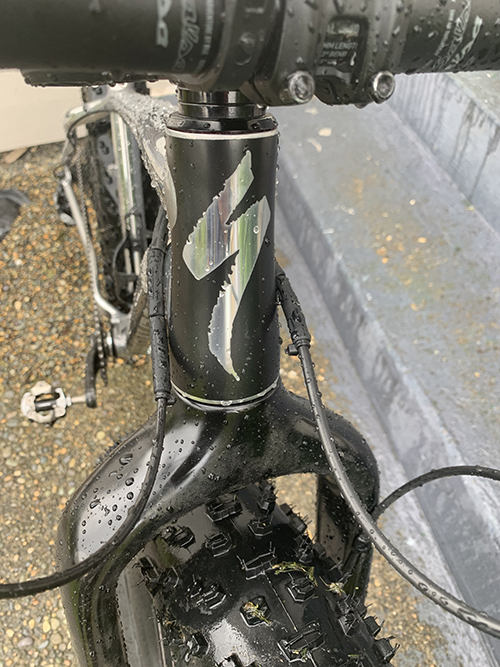
Sign Writers Applying Graphic I designed. The finish print is Saturn Black. With a clear wrap applied over the top of the SPECIALIZED splash.
The look I was wanting. Letters are the Alloy Frame. Drink bottle cage divets fit inside the S & P letters.
Using our new kitchen as a backdrop!
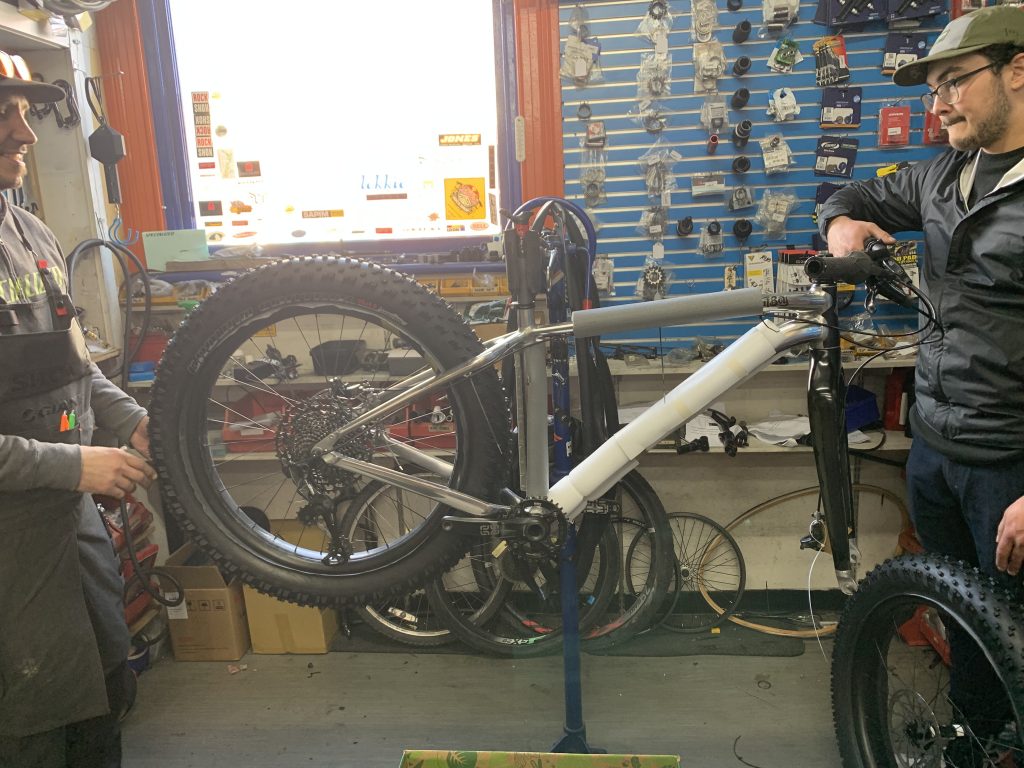
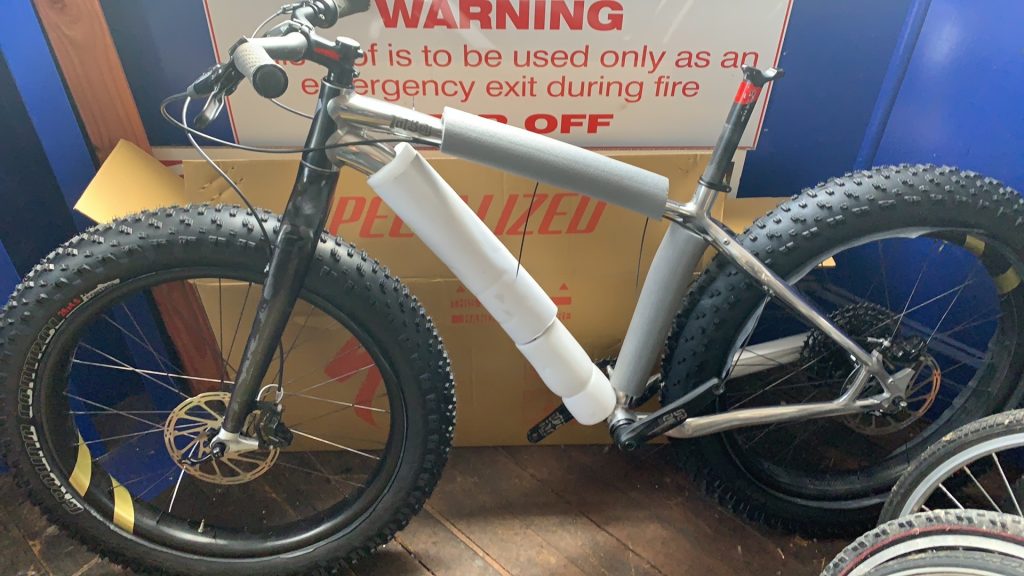
The bike soon off to get assembled. Thought I’d get the local bike shop to do the job of putting it together. Then at least I know everything is done professionally. Using foam to carry frame but more for assembly and grease. I do expect to get it dirty.

Box of bits now reduced to one box. New Tyres put on as well.
At the bike Shop. The Boys putting it together. Missing End Caps from new DT Swiss front, caused a 2 week delay. while we sorted a fix with actuals on backorder into NZ.
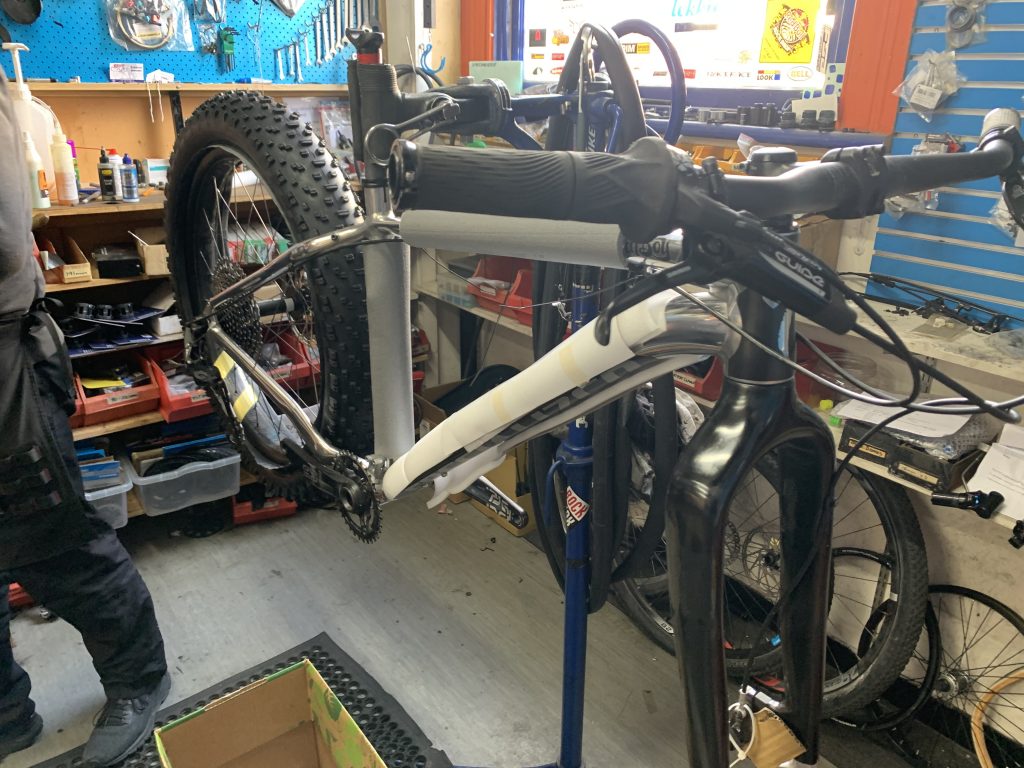
Waiting for cables to be tidied up (shortened and routered to avoid rubbing on front tube), seat post to be changed (to new carbon) and final true up of wheels onto Hubs.


Part 2: Once upon a Time, I bought a FatBoy.
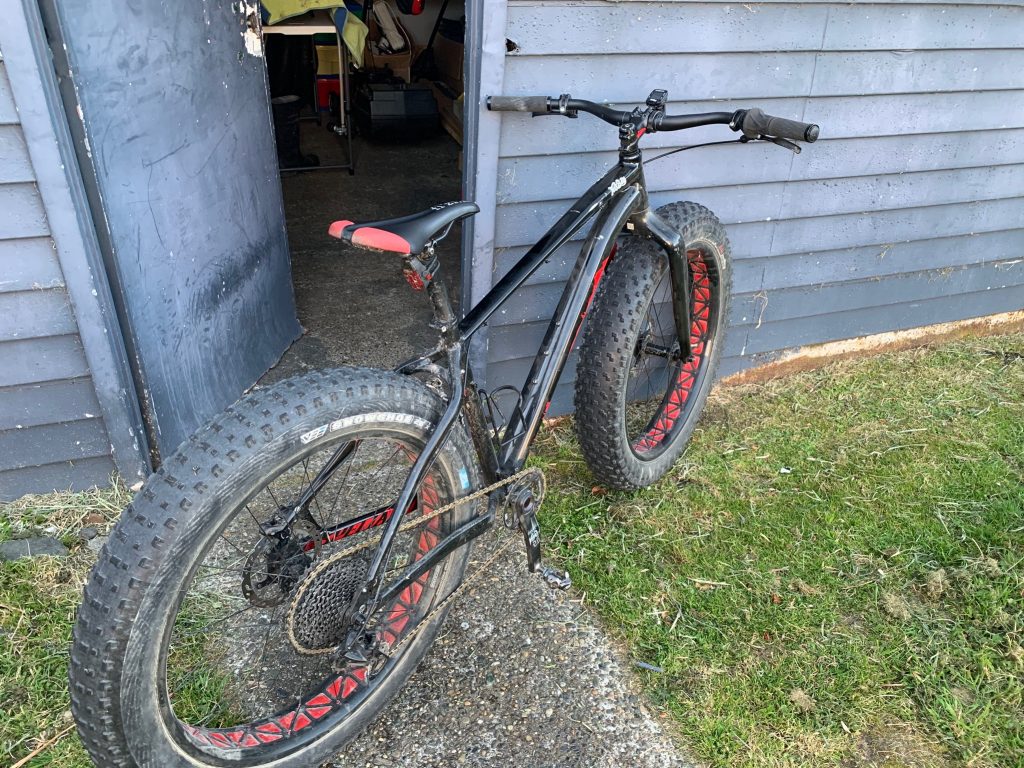
My 2014 FatBoy bike used to be a Bike Shop Demo, Alloy Frame, SRAM X0/X7 Group Set and came with a rigid carbon fork, nothing fancy, except for the grip shifts for the front and rear derailleur (which I thought I would hate)
The Bike shop sold it to a Lady in Aklnd who had it for several years until I purchased it from her in 2019.

Stock Fayboy, except for the tubeless tyres
I’m sure the tires were still the original from the factory; the bike was in ok fair condition, scratched/beaten up in the usual places, working well but still used.
Since I have had the FatBoy, and before this rebuild, I have done some sneaky upgrades.
Warning:
Everything has a story… and since you bothered to read this far I’m going to tell you the long version. Grab your snacks, coffee and get comfortable.
Quick Links
Bottom Bracket
When my original bottom bracket started to creak, we had trouble finding a replacement, and the local bike shop made up a “custom” BB, with new bearings, which only lasted about two months until it started to creak again. During that time, I was changing my groupset, so in the end, we put a new Raceface Bottom Bracket in, and all my creaky problems went away.
Groupset
Even though the 2x X0/X7 system was reasonably robust (and, I must admit that the gearing ratios were sufficient to ride with), I just decided I needed to modernize.
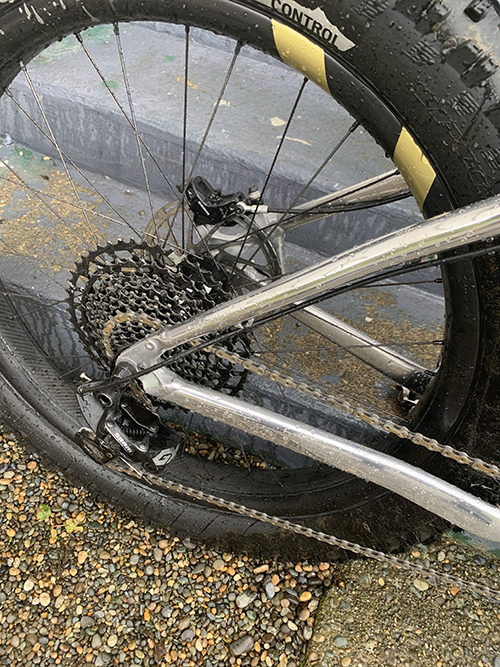
The groupset changed to a 1x, 34 Crank, and 12 Speed Sram 11 – 50 Cassette, running a GX derailleur and a gold chain (yup Gold, cause I like to be different)
- the Crank Arms are still from the original X0 Groupset.
All I achieved was a massive weight reduction (and the look) by changing away from the 2x X0/X7 to a 1x. The Ratios were quite close between the old and the new. Still, easy to ride.
I also retained the Gripshift Shifter system but bought a new 12 Spd Gripshift for SRAM set up. (ching-ching)
Brakes
You know that feeling of embarrassment when your brakes squeal when they should just shut the F Up. I do.
My brakes started squealing in the dry within minutes of riding. Then they decided to be quiet for a while, and when I thought my life was bliss, they suddenly got all angry and in up in my grill and wouldn’t stop squealing. Every ride, every time dry or wet they squealed.
Most annoying.
The obvious choices were to change the brake disc pads. Burn the grease off with some special stuff, put Metal pads in, put Resin pads in, try Metal again, then Resin again. Use Alcohol on the Rotors. But, nothing stopped the dreaded squeal.
We replaced the rotors with a new set, the Angry Squeal went away and then came back two weeks later.
We concluded that the Specialized Fatboy factory braking rotor discs were too small, and the 2 pot brake calibers were undersized for the overall size (and I might add, POWER) of the FatBoy.
This may have been particular to me, emphasized by how I ride and use the brakes.
My brakes woes were fixed when the whole braking system was taken off and changed to a GUIDE set up with four-pot Piston calipers, bigger Discs, the whole set up was taken from a 2020 Giant Trance new Demo bike.
This instantly solved my squealing issues, and man, the bike stops.
Seatpost
I changed the seat post to Carbon S-works because you know. It is bloody light. I then snapped the seat post six months later when I hung a drink bottle of the back of the Seat, and it acted as a big lever over some rough terrain bumps; I threw the original Alloy one back on with Plans to get a new Carbon one later.
- Note to Self: Don’t hang stuff off your carbon Seat post.
Rims / Tyres
My stock wheels were changed from Tube to Tubeless (see the post I wrote)
I then put a temporary second-hand tire on the rear when I had some big nasty holes not sealing up.
Seat
Yes, I changed the Seat. It wasn’t the stock saddle, as the Lady owner had a “lady” seat on it.
For the record, that “Lady” Seat with 3+ hours riding time was bloody comfortable.
I changed to a Fitz Roy Endro seat, which has done it is due and indeed served its purpose.
Pedals
Of course, you have to change your pedals. I came from the early days of Shimano SPDs, so I fitted a pair of XTR SPD pedals.
- I have ridden with flat pedals, but I prefer the SPDs.
——
With the first upgrades done so far, the Fatboy rolled and performed very well (for its age). I wasn’t going to do much with the bike as it was functional as it was. I used it as my primary all-year-round bike for everything, even races.
Then I stumbled across a set of second-hand carbon fiber Rims for sale; one was damaged, the other was in perfect condition. So I bought them and had one of the Rims repaired
- The plan was to one day put them on the Fatboy. (This seemed like a daunting job to change rims, spokes, and hubs. )
A few weeks later, Speclaized NZ had new Fat Boy Tryes for sale on a deal, $110 for a pair. We bought three sets, I took one set of tires, and my other FatBoy clan grabbed the other.
- You have to grab the deals while they are there, or you will always miss out.
Having the Carbon Rims and new tires put the thought in my head to strip everything down and rebuild. What also sparked it off is the local bike shop that I deal with; their Mechanic was showing me photos of his Ebike he stripped down to the raw Alloy to have a polished finished look, which looked stunning.
I thought I’ll give that a crack as well.
(Carbon Rims and Tires not in this picture, as they were for part 2)
DISASSEMBLY
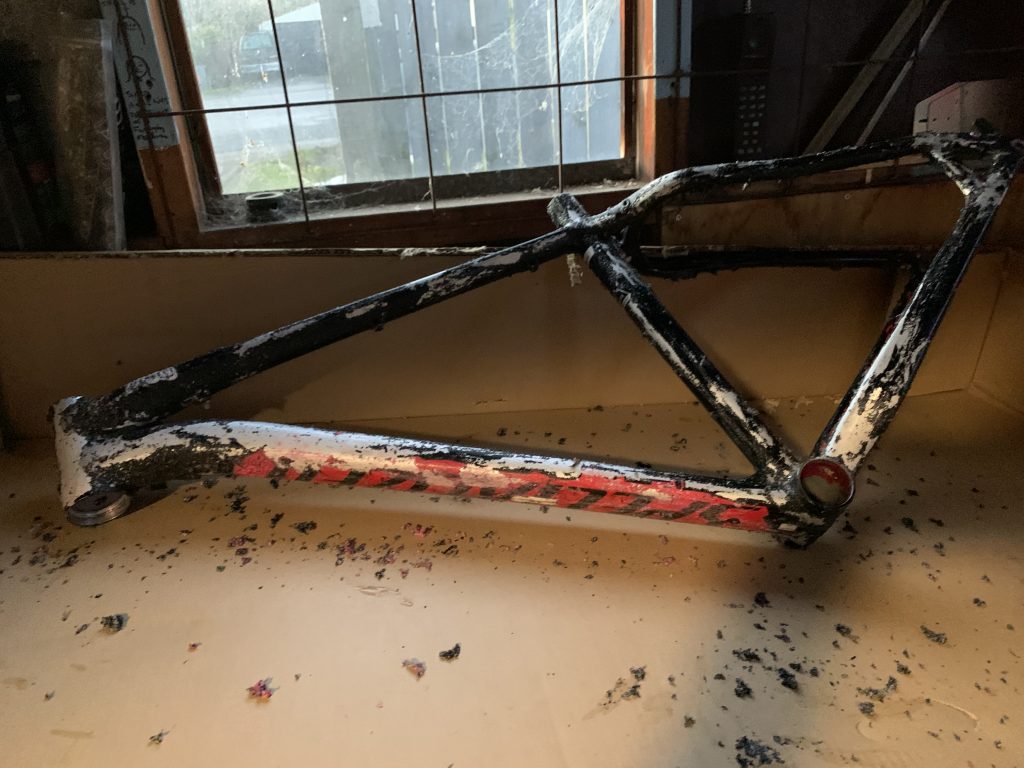
Stripping down the FatBoy was relatively easy.
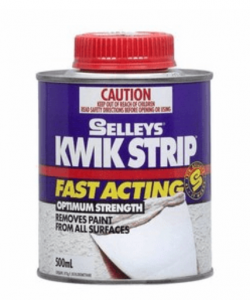
Using Paint Stripper a plastic scraper the paint came off the alloy frame quickly, and then a metal pick to get the paint out of the welds.
Note: Paint Stripper – it’s potent stuff, be careful.
- burns your skin. so use gloves
- don’t use on anything carbon (like the fork)
The paint stripper I used can be found here.


.
SANDING!
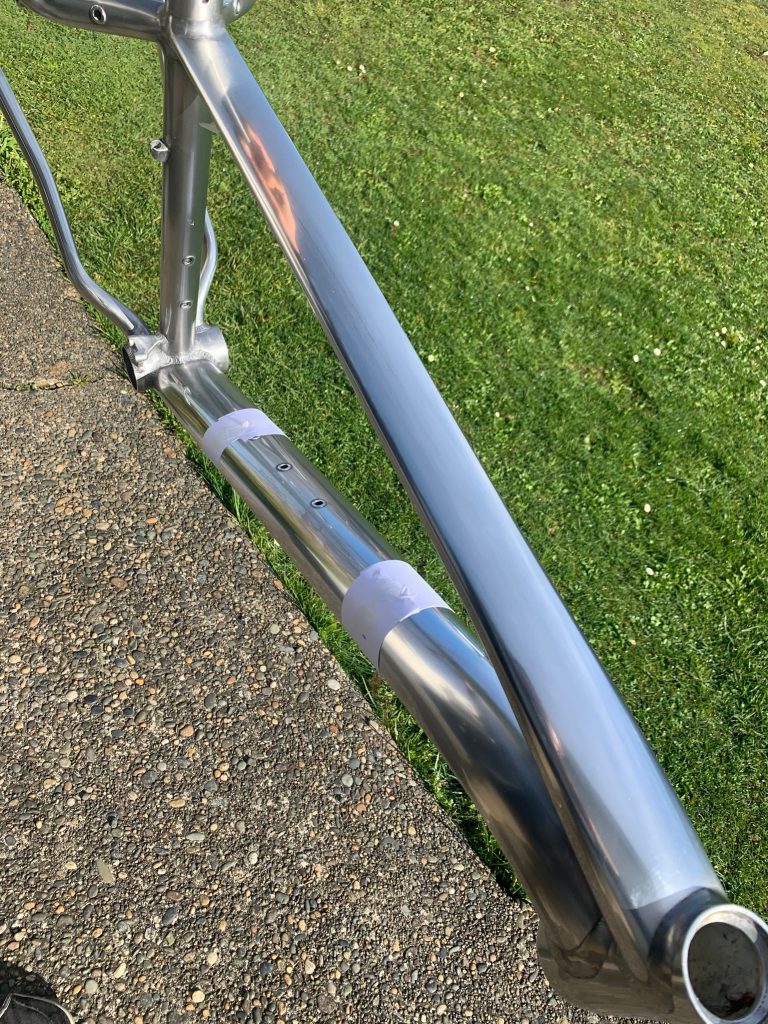
Sanding the frame took some time.
I started on 180 Grit Dry, then went
400 Grit Dry
800 Grit Dry
1000 Grit Wet & Dry
1500 Grit Wet & Dry
2000 Grit Wet & Dry
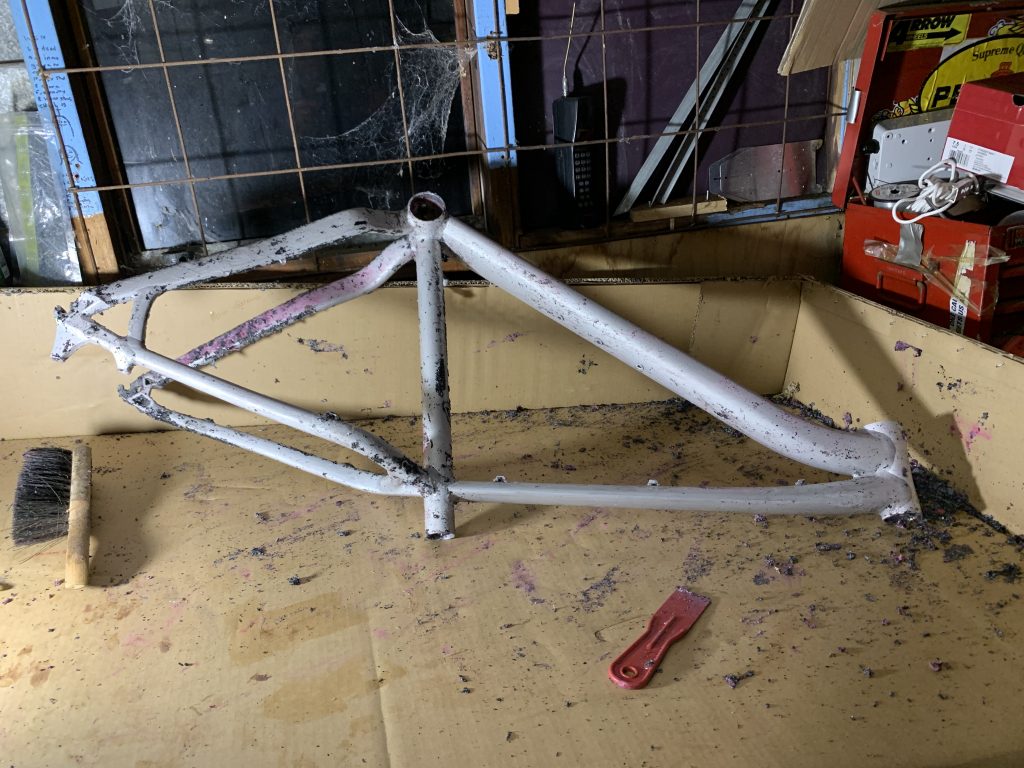
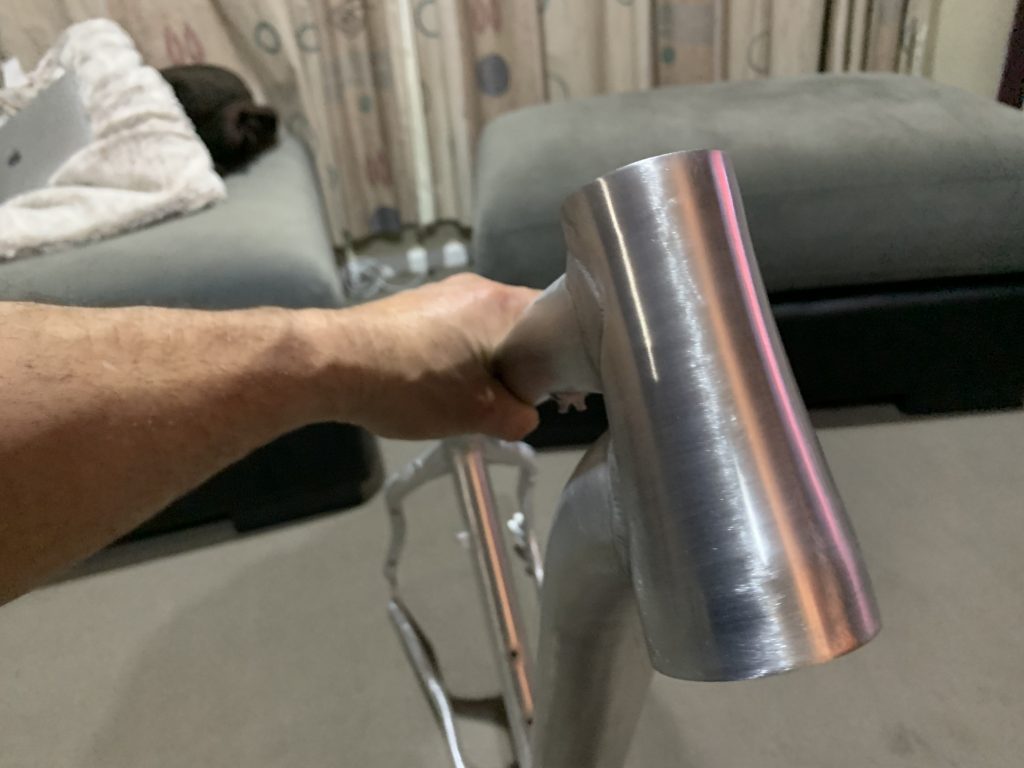
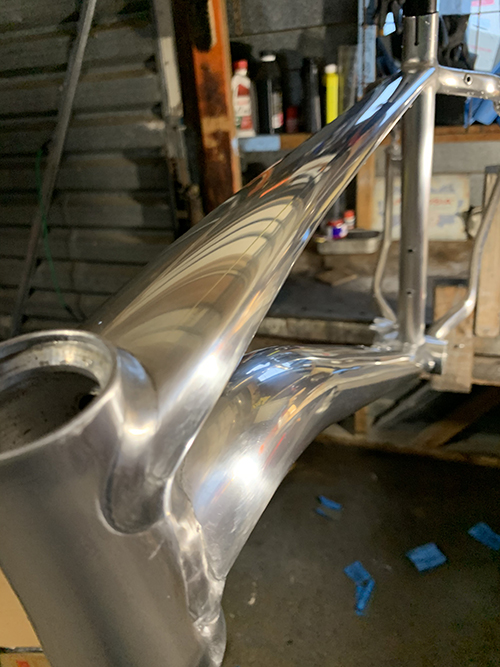
The frame didn’t start to look good until I got to 1000 Grit Wet & Dry. Until then, I wondered why it wouldn’t come up smoothly and scratch-free (with the many hours of sanding undertaken).
The trick is to go crazy on the lower grit sandpaper to even out as many of the bumps, dents, and notches you can. Sanding crossways about 800 grit seemed to make a bit of a difference. It started to smooth out about 1000 grit. Going 1500 and finally, 2000 grit took it to another level of smoothness. Not quite glass finish but looks the part.


The carbon fork was the most time-consuming part. I started at 1000 grit got impatient after about 3 days and went 400, 800, and back to 1000. The black paint and carbon parts of the fork looked the same in places so it was hard to determine when to stop. ideally, you won’t want to sand your fork into nothingness.
I took the fork into my local bike shop, who gave me guidance on how far I should sand the fork to and what it should look like at the end.


.
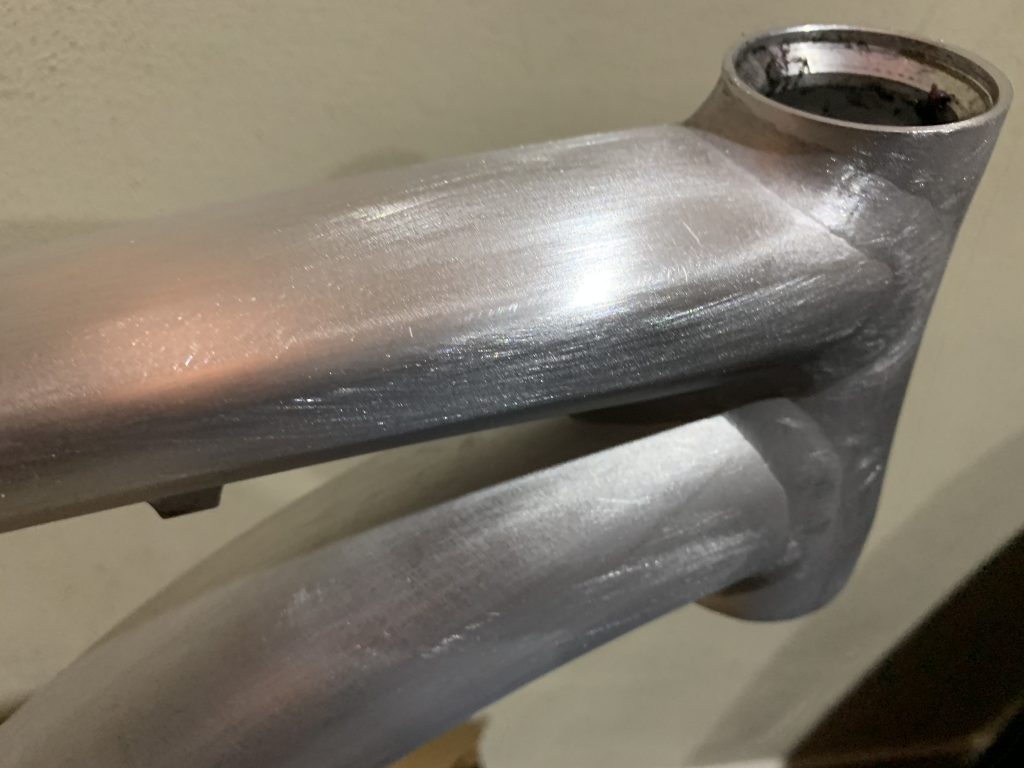
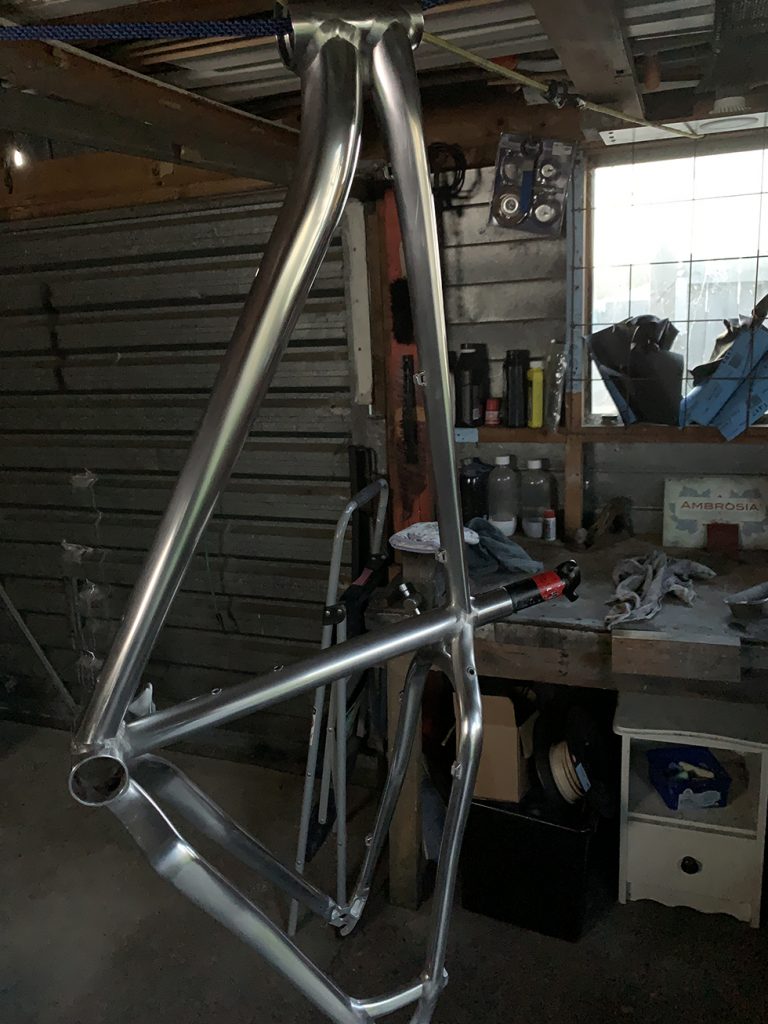
POLISHING
It is incredible when you start to polish with polishing compound how many scratches polishing hides. Over these photos below, I had resanded the Top and Bottom Tube twice with 2000 Grit (or was that five times). The problem was the more you make it shiny, the easier it is to get picky about the finer scratches. And once you see a small fine scratch, you have to fix it with more sanding. Then you take it outside and see more scratches in the sunlight and go back to sanding.
Not to mention, buffering. I used a buffer pad on a corded drill. This is an excellent way of accelerating the polishing. That is until the drill slips and chuck smacks into your frame, and then you are back to sanding then polishing again.
I started polishing around the 1000 grit sandpaper mark. I got fussy with the Top tube and the side of the bottom tube because that is what you see the most of. Going 1500 and 2000 grit made a massive difference. The last sand on the frame was 2000 grit, all over. The back rear frame arms got less attention.
Autosol was the first product I used to polish the frame, and it made it look awesome. The problem with Autosol is that you can put too much on, and knowing that the next step was to clear coat the frame, I couldn’t leave the product on the alloy frame knowing that was to be sprayed. So the more I put on, the longer it took to polish any excess away.


.
Cleaning the frame
I thought I would be smart here and used some degreaser alloy cleaner for car wheels. It looked good in the photos. But it didn’t clean the frame that well. I then used dishwashing liquid which looked ok, but still could see some build up in places.
The best way to remove any hint of grease off the frame is mentholated spirits.


.
Clear coating
Everyone asked, are you going to Lacquer your raw alloy frame. The immediate answer was “yes, of course!” (then off I went googling what I had to do)
There is a problem with Clear Coating (Lacquer) and its to do with Alloy metal. There is no activator in the clear spray that guarantees the clear coat will stick to the alloy surface permanently.
So I found that out after several things:
1. No spray painter would guarantee it will last,
2. I sprayed the frame myself, and it didn’t last longer than two weeks before it started to peel off, (Even heated the frame up, worked well – peeled off)
3. when I eventually found and spoke to a guy that repairs and paints alloy car rims, he said he’s been looking for years for a clear spray solution and is yet to find one.
The reason why you have to clear coat (Lacquer) the raw Alloy is due to oxidation. That is when oxygen oxidases your Alloy metal, it will turn black then erode over time. Yup (thanks a bunch, Alloy Metal!)
However, there is an easy solution. Painting the frame or stickering up the frame will form that seal.
But that wasn’t for me.
In the end, the guy who repaired alloy wheels told me his solution, and it was in the form of a bottle that cost $30, and you hardly used much of it.
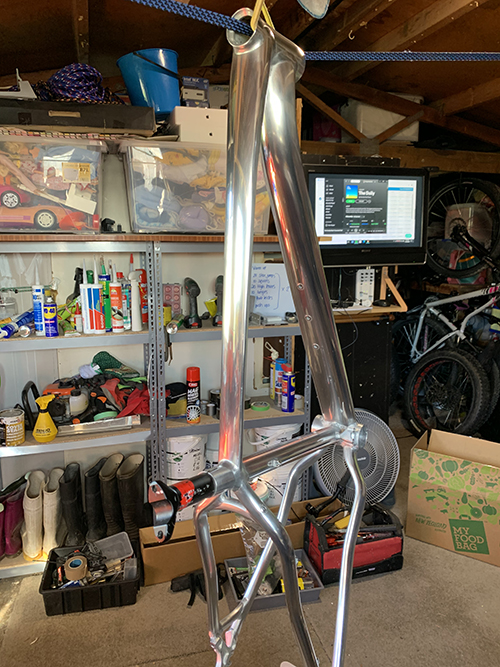
Polisher and Sealer
Not only was it a better polisher than Autosol, but it provided a seal over the alloy frame as well.
I am not kidding. The solution to a tricky dilemma?
Is this product.

Find it on google here.
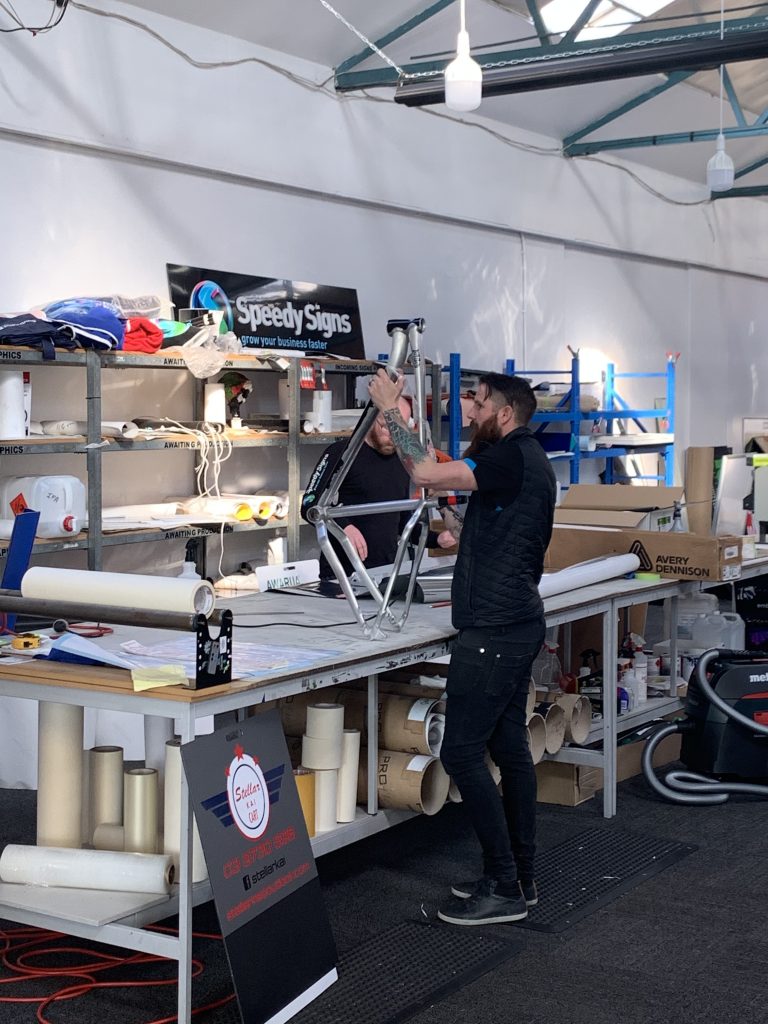
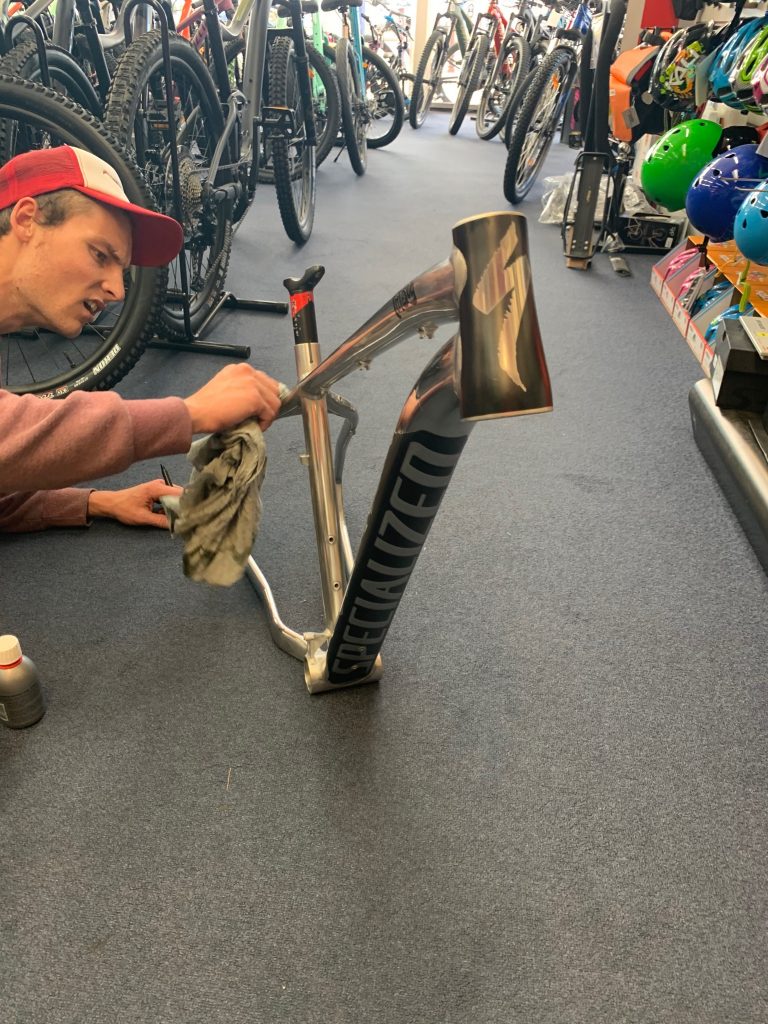
Here is the first coat being applied by one of the guys in the Local Bike Shop. This photo is iconic because Mat here is a champion NZ road cyclists, and the fact I have him polishing my MTB frame is priceless.

.
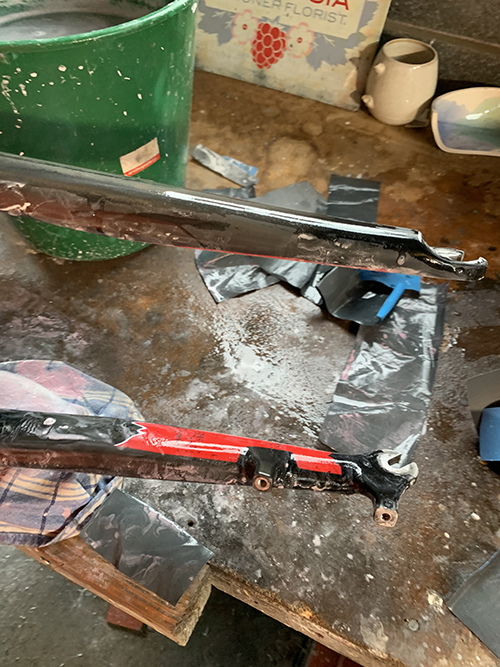
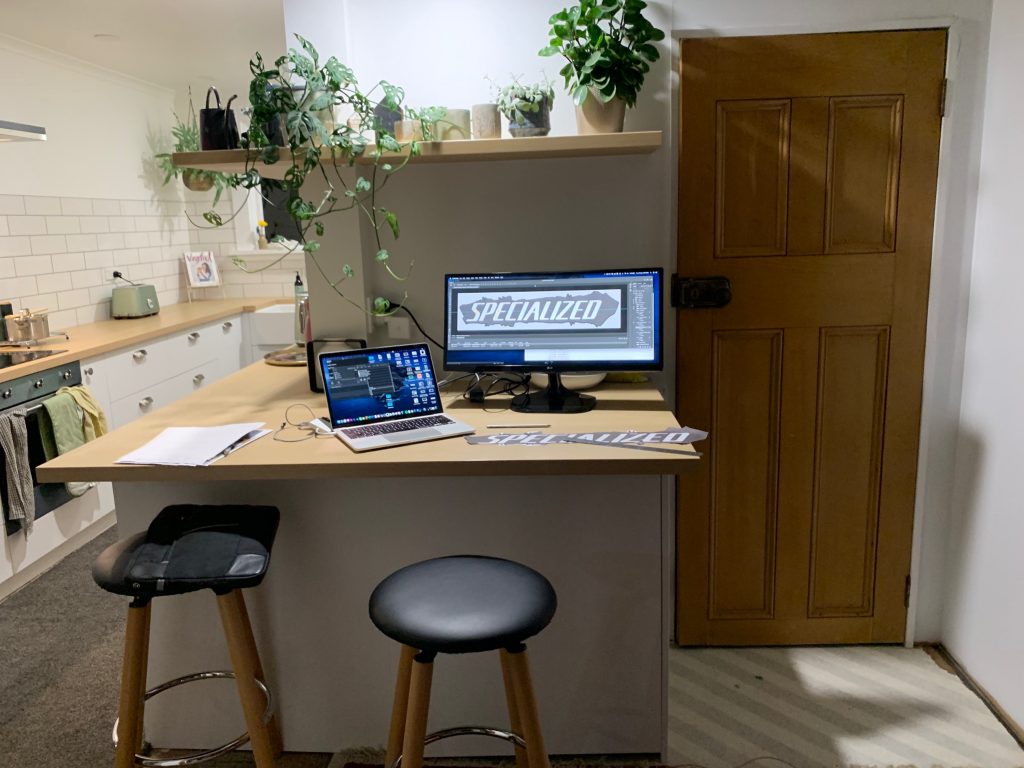
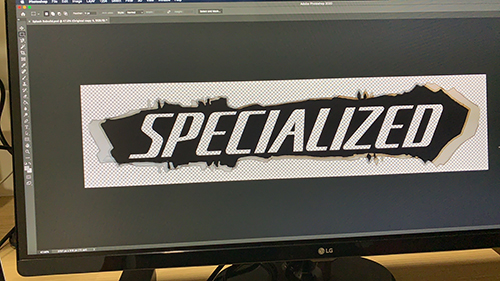
Graphics, splashes, logos, mock-ups, and finals.
Here are the fatboy & SPECIALISED logos and my modified splash for download
Getting original graphics for a 2014 FatBoy was not that easy.
Luckily the local bike shop Specialized NZ Rep managed to supply the FatBoy Logo, but the other Logos – underneath the bottom tube and the front tube do not exist.
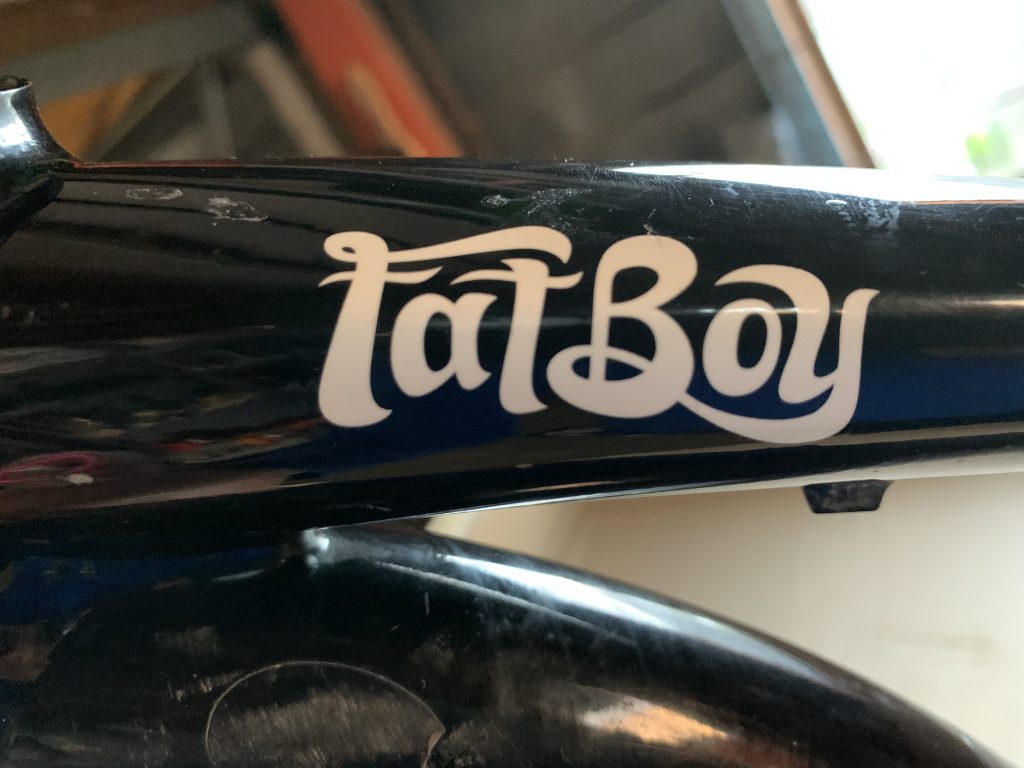
The FatBoy logos changed with the 2015 model FatBoys.
What I call the SPECIALIZED Splash is the graphic that goes on the underside of the bottom tube. I emailed Specialize in the states who responded but said get a signwriter to make you one. A bit disappointing that they couldn’t make more of an effort to talk internally with their people, I mean, here I was honoring the FatBoy bike – their design, but it was not the end of the world.
In the end, I made my graphics in photoshop.
I did that by taking a pencil stencil of another FatBoys underneath splash graphic, photographing that stencil, and then using that as an outline in photoshop.
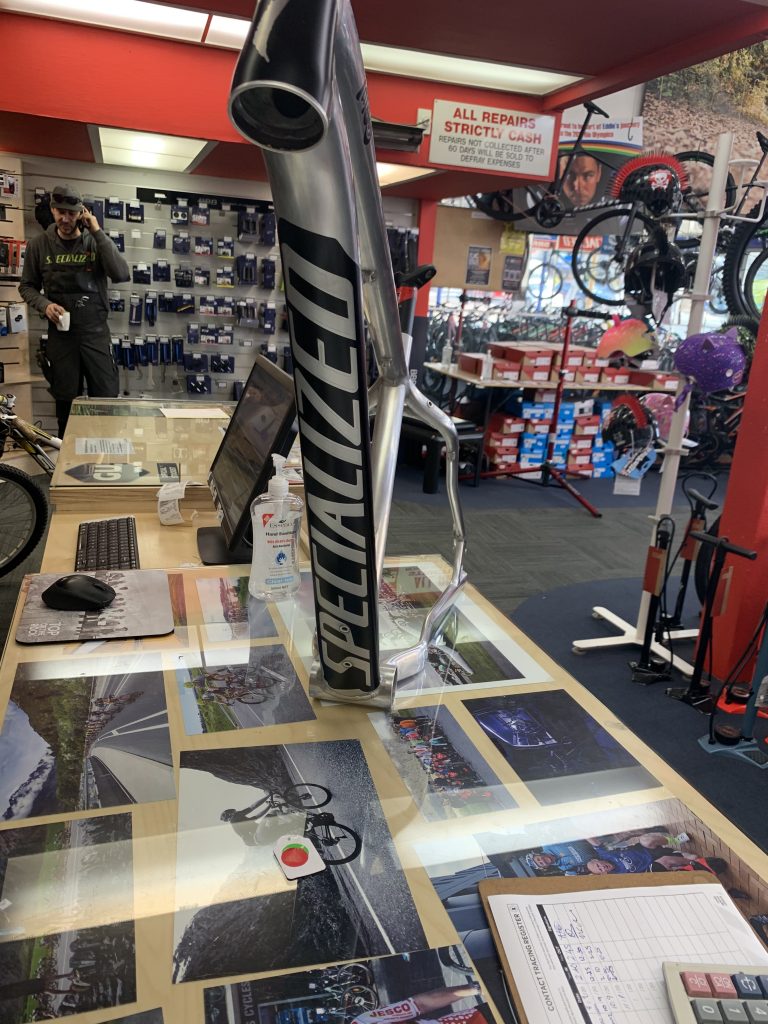
There is a problem with the original underneath splash graphic; its lettering does not align well with the frames drink bottle divets. The look I wanted is for the SPECIALIZED lettering to be the raw polished alloy frame only, and the rest was the splash background. But if I kept the original lettering placement, the divet’s raw alloy would be visible in the background splash, and that would look wrong.
So, in photoshop, I moved the lettering in the graphic so that the SPECIALIZED sat lower to the bottom bracket. I also opened up the font on the “S” and the “P,” widening enough, so the divet sat inside those letters. I also had to widen the Splash, so it wrapped more evenly around the bottom of the frame to the edges.
I wasn’t too fussed with the detail on the edges of the Splash. If SPECIALIZED had supplied the original graphic, I would have kept these as the original.
I then made some rough mock ups and applied to the frame.


The signwriter took a couple of weeks to get to the graphics, during that time I had the clear coat issue as detailed previously above.
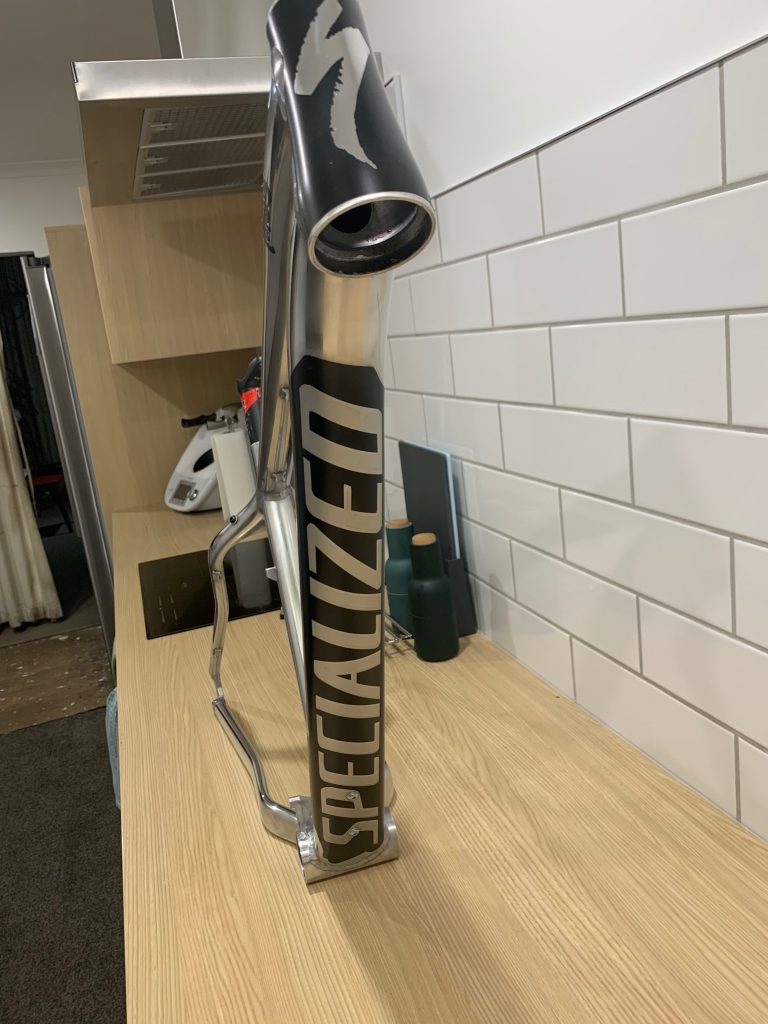
Here is the finished look. (frame was not polished in these photos)


Hubs, Tubless & lacing
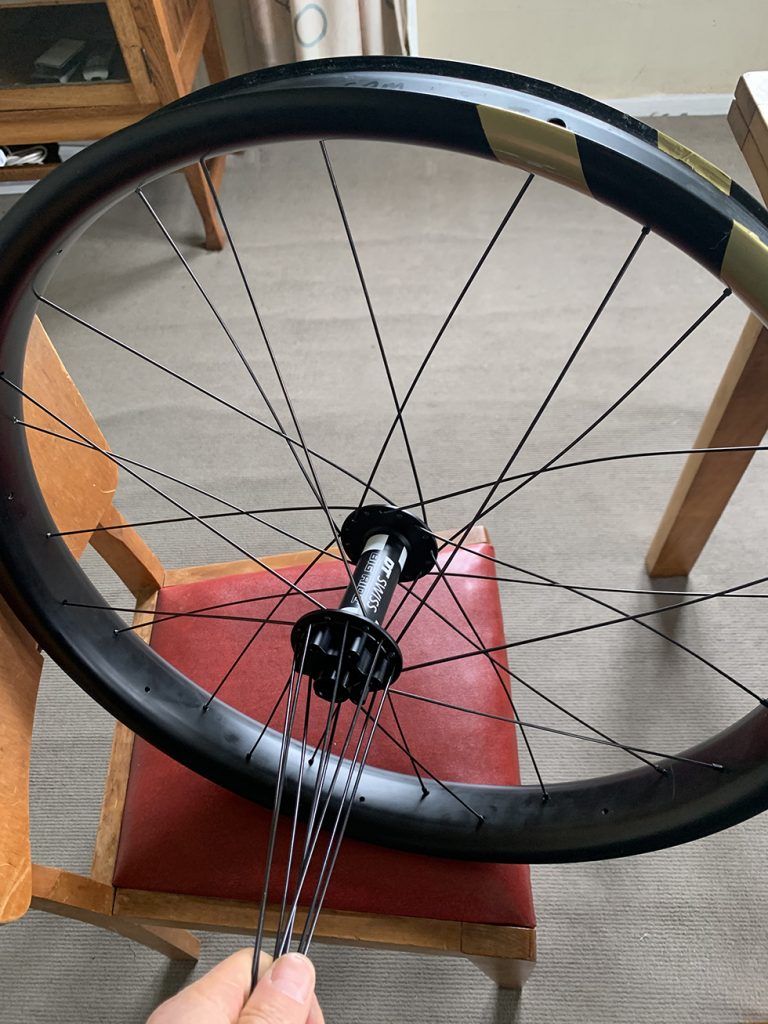
When you replace your Rims, it would be foolish not to do new spokes + nipples. I went for tapered spokes + black brass nipples
And Hubs as well
It was a toss-up between DT Swiss and Hope 4 Pro Hubs. The local Bike shop recommendation was DT Swiss, I liked the Hope 4 Pro pricing, DT Swiss won.
The set up is tubeless. I’ve had success with my previous method, so the tubeless setup consists of 2 x 24″ Kids Fat bike Tubes. (That I will cut longways, which form the seal across the RIM internal wall.
The internet helped me lace up my wheel. I will state that it is a bloody confusing process, and my hat goes off to all you wheel builders out there.
Lacing wheels takes some patience; the pattern I followed was a three cross, which means a spoke crossed other spokes three times. The gurus said this gives maximum strength on the wheel.
There is a pattern and an order you need to follow for each side. Following this ensures the last spoke threaded doesn’t have to be over bent to be physically laced together, requiring a bit of “assistance.”
One side went fine; on the opposite side, I redid about 3 or 4 (5,6,7) times, ending up having to over bend spokes to finish.
It is incredible how far you can bend a spoke, and then when the wheel is professionally trued up, how every spoke gets magically straightened, and no one knows how much of shit job you did in the back-to-front lacing of your spokes.
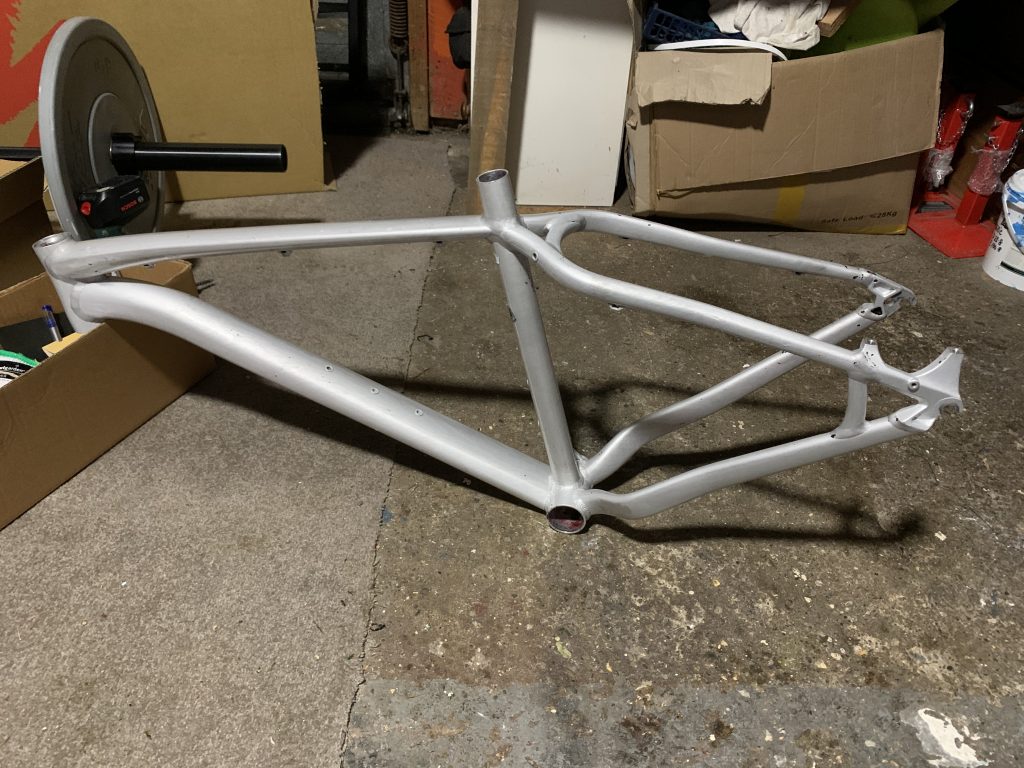
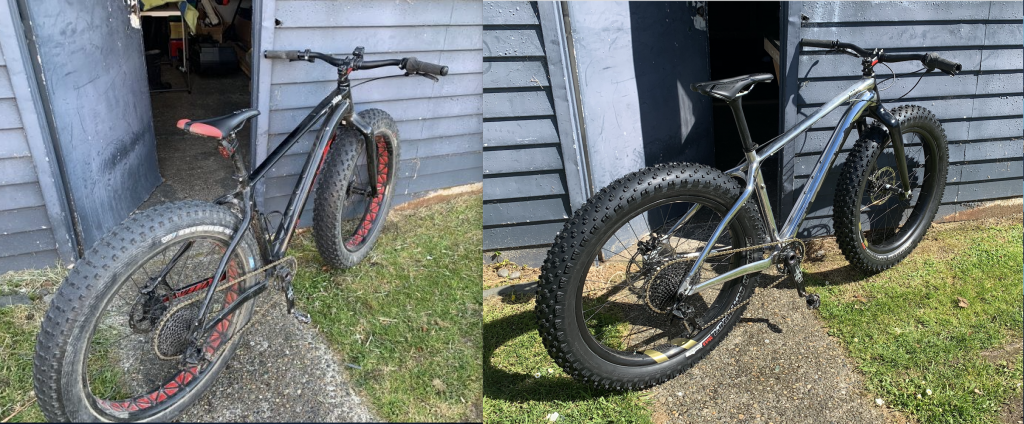
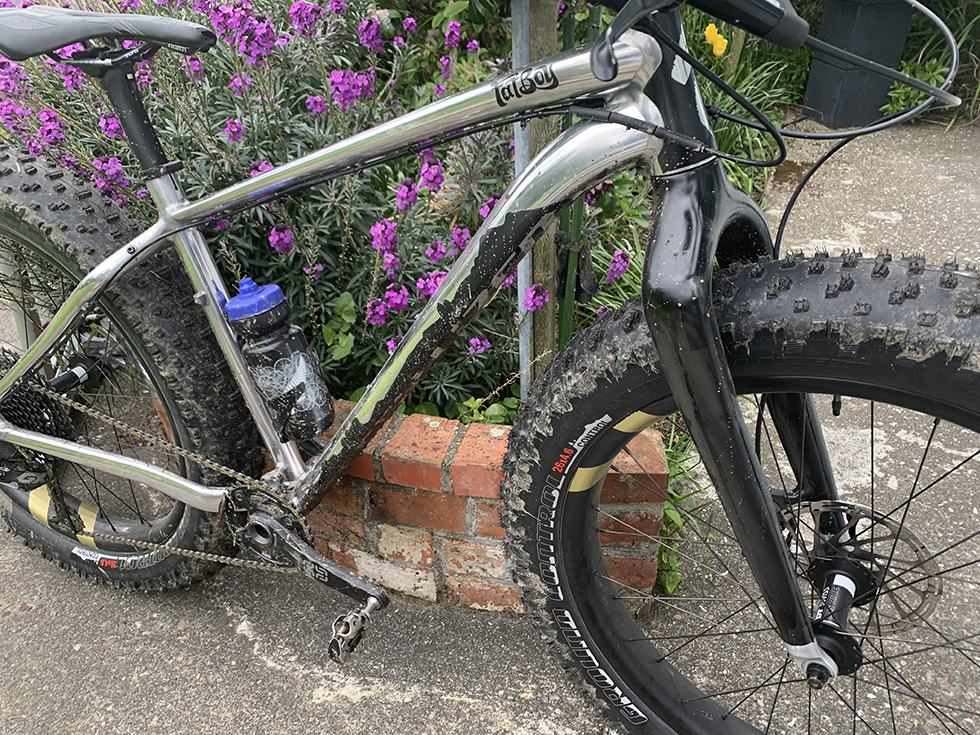
The Finish
A before and after


So whats next?
Bikepacking

1 thought on “Rebuild”
Comments are closed.